B engine water pump rebuild using standard industry parts

THE place for technical discussions concering the construction and preparation of SAABs for all forms of motorsport, Rally, Road Racing, Auto-X etc....
User avatar
Geoff
Team Turbo Troll Crew
Posts: 3890
Joined: Fri Oct 20, 2006 3:31 pm
Nickname: Geoff
Number of Saabs currently owned: 6
Location: Nude Humpshire

B engine water pump rebuild using standard industry parts

Postby Geoff » Wed Dec 30, 2009 12:22 am

I’m not a big fan of people converting B engine cars to electric water pumps if the water pump shafts are still in good condition. Since the pump needs to be removed regardless I’d rather see the pump rebuilt then go with an electric pump that won’t last as long as a standard pump. Some people convert to electric because they can’t find the rebuild kits. To solve this dilemma I sourced all of the parts in a standard rebuild kit from McMaster-Carr (an industrial supplier) for about $35.

Below is a parts list including part numbers and a water pump rebuilding tutorial.

All parts sourced from http://www.mcmaster.com

Bearing:
McMaster part #: 3760T4 http://www.mcmaster.com/#3760t4/=556dxe
Price: $17.93
Industry standard: R10, open
Manufaturer: NSK (built to ABEC-3 rating)

Circlip/snap ring:
McMaster part #: 97633A230 http://www.mcmaster.com/#97633a230/=556gcf
Price: $0.10 (sold in bags of 100, if anyone wants some let me know and I can mail them)
Size: 5/8” snap ring
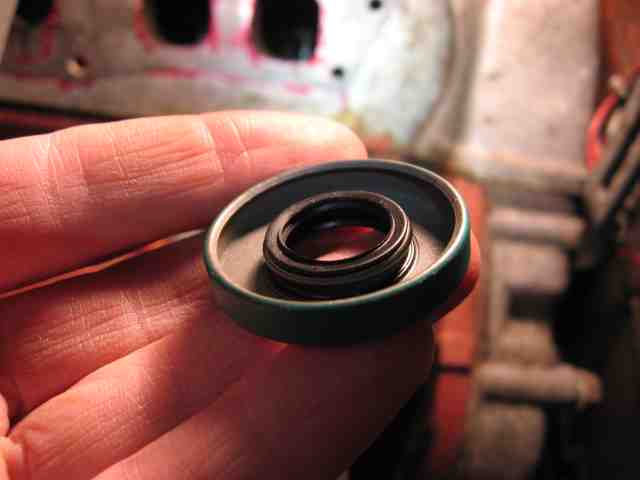
Oil Seal:
McMaster part #: 5154T34 http://www.mcmaster.com/#5154t34/=556kzk
Price: $6.84
Industry standard: Spring loaded shaft seal, double lip for 5/8" shaft, 1 3/8" bore
Manufacturer: SKF (part # 6373)

Water seal:
McMaster part #: 9281k183 http://www.mcmaster.com/#9281k183/=556hy4
Price: $6.71
Type: 304 Industry standard: #1000
Manufacturer: Pac-Seal Flowserve

Gasket material:
McMaster part #: 75125A66 http://www.mcmaster.com/#75125a66/=556ly0
Price: $15.36 (enough to do more than one complete engine) You’ll use about $0.50 worth
Loctite 518 flange sealant and gasket eliminator

The first step is to drain the coolant, remove the alternator, slide the alternator bracket out of the way, remove the hoses from the water pump cover and intake manifold, remove the intake manifold and remove the water pump cover.

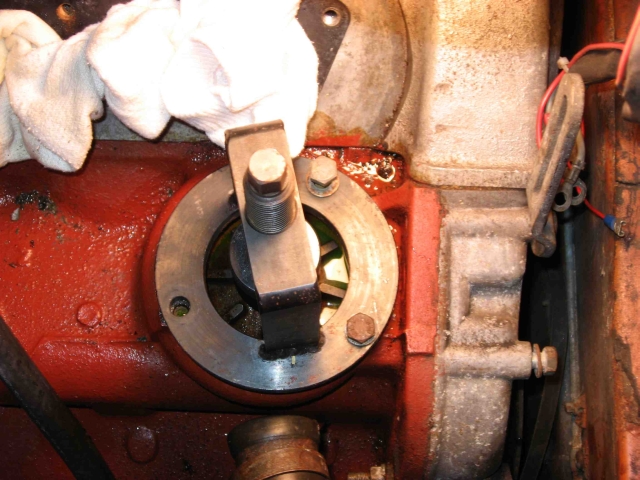
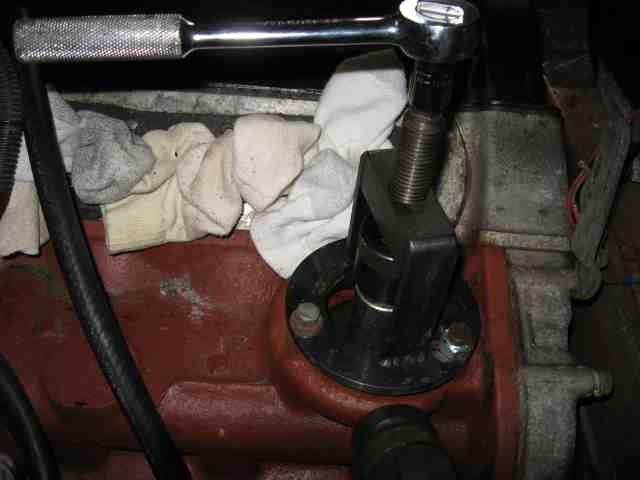
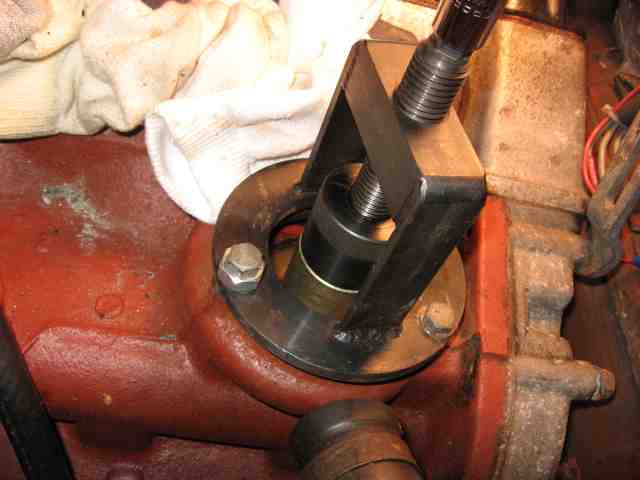
Then fit the water pump tool by threading it onto the water pump shaft. The threads are a left hand thread and I think there may have been different thread sizes. Some impellers have a bolt and some have a nut and some have nothing but interference holding them on. If you have to remove a bolt or nut, do it carefully and try to hold the impeller steady so that the pump doesn’t spin as you remove the fastener (you don’t want to damage the gear teeth on the shafts). Use the pump tool to pull the pump out. It will spin as it comes up because of the pitch on the gear teeth.

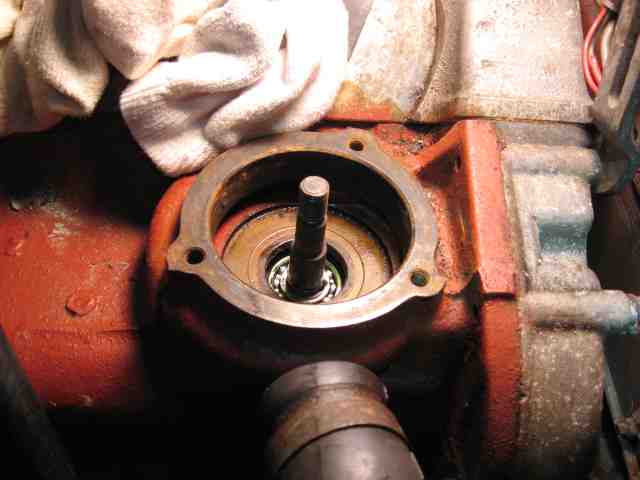
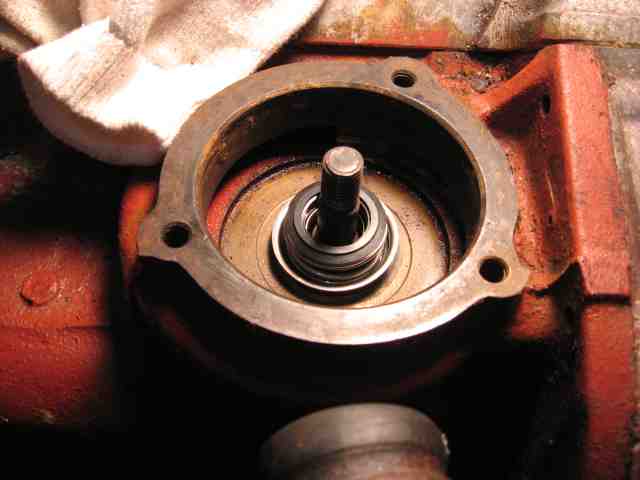
Pulling out the pump:
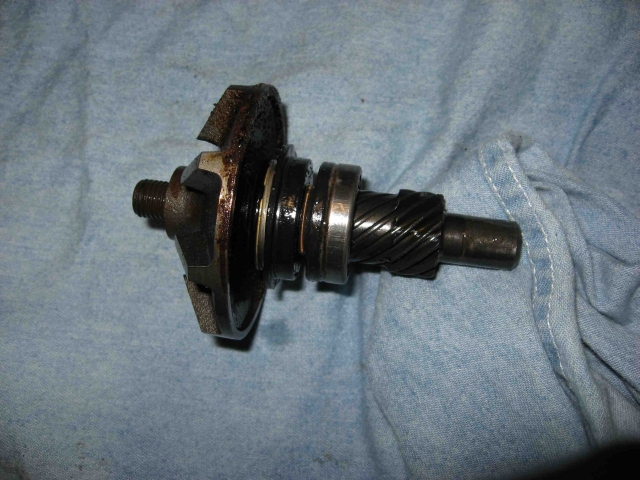
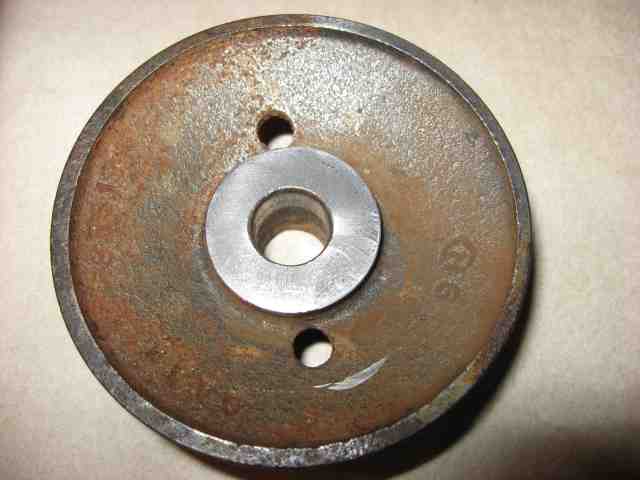
Image

Pump removed:
Image


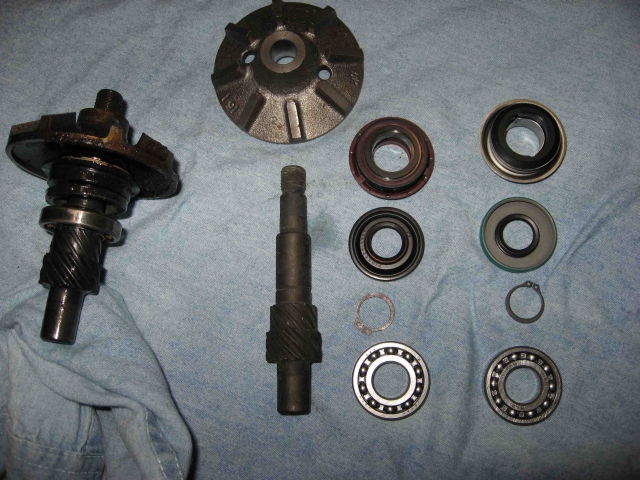
Old pump on left, OEM rebuild kit in center, new parts for rebuild from McMaster on right:
Image

Now press the impeller off the shaft. Support the impeller from the underside and place a flat tool on top of the shaft when pressing. I use an Allen socket, 8mm when pressing an externally threaded pump shaft. It contacts flat on top of the shaft and is chamfered so it doesn’t interfere with the threads.

Remove the water and oil seals and remove the circlip. Press off the bearing.

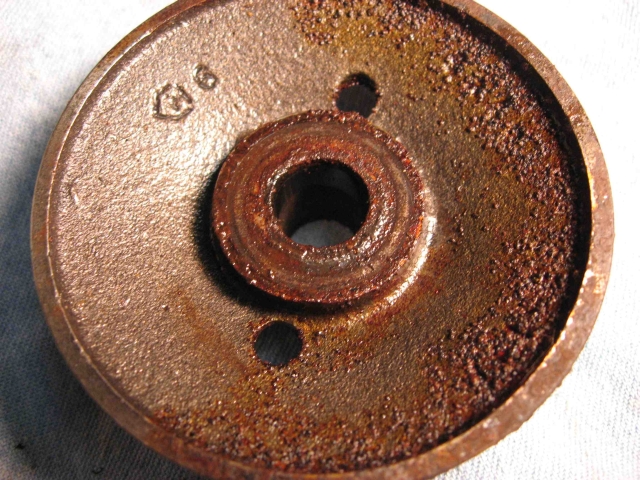
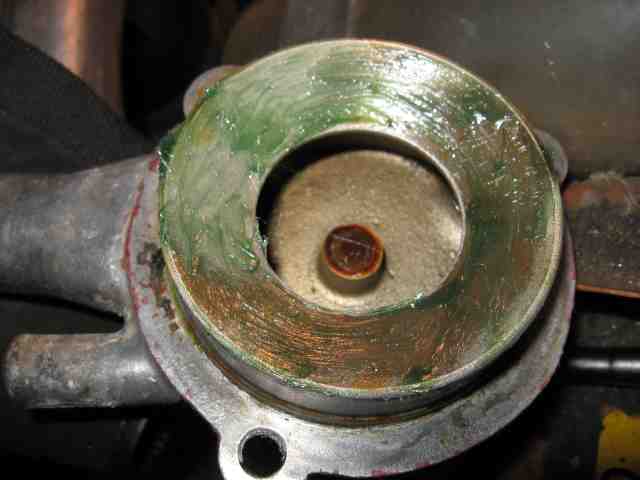
Inspect the impeller. Typically they might be corroded and a grove is worn in them where the water seal contacted. You’ll want to touch up this surface before re-assembling so that the water seal won't leak.

The underside of this impeller was pretty nasty, the engine had been sitting for a while:
Image

I had a friend of mine who is a machinist touch up the seal contact area:
Image

Clean the shaft, the recess in the block where the water pump was removing the old gasket, cleaning the water seal contact surface, the bearing contact surface, and the recess that the bottom of the pump shafts sits in (using Q-tips).

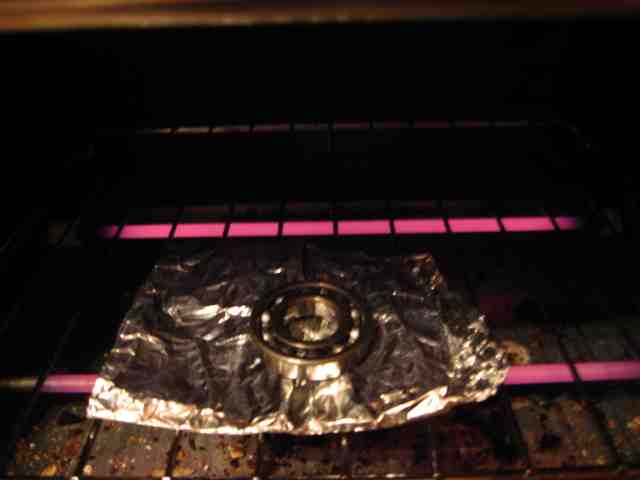
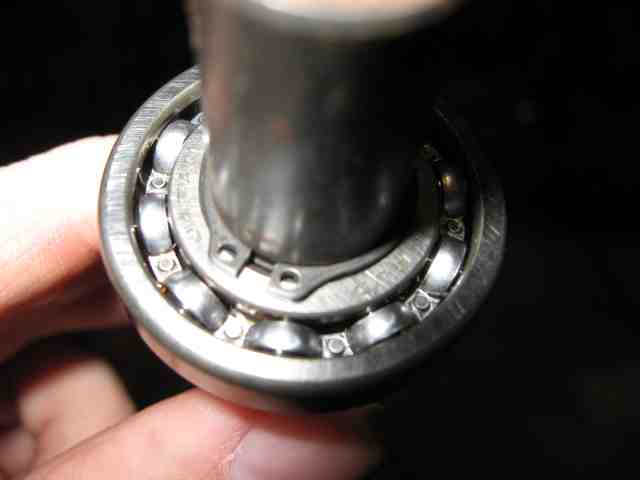
To make assembling the bearing onto the pump shaft a little easier you can chill the pump shaft in the freezer and heat the bearing to around 200F.
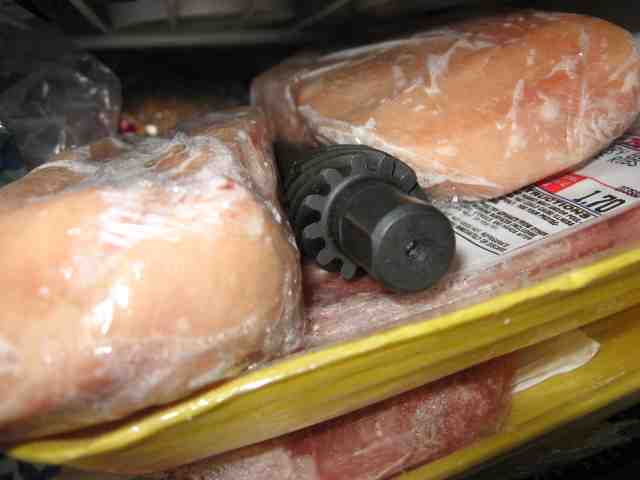
Cold shaft:
Image

Toasty bearing:
Image

Work quickly when slipping the bearing on as the temperatures will equalize quickly. Press the bearing onto the shaft until it stops by only pressing on the inner race.

Pressing on the bearing:
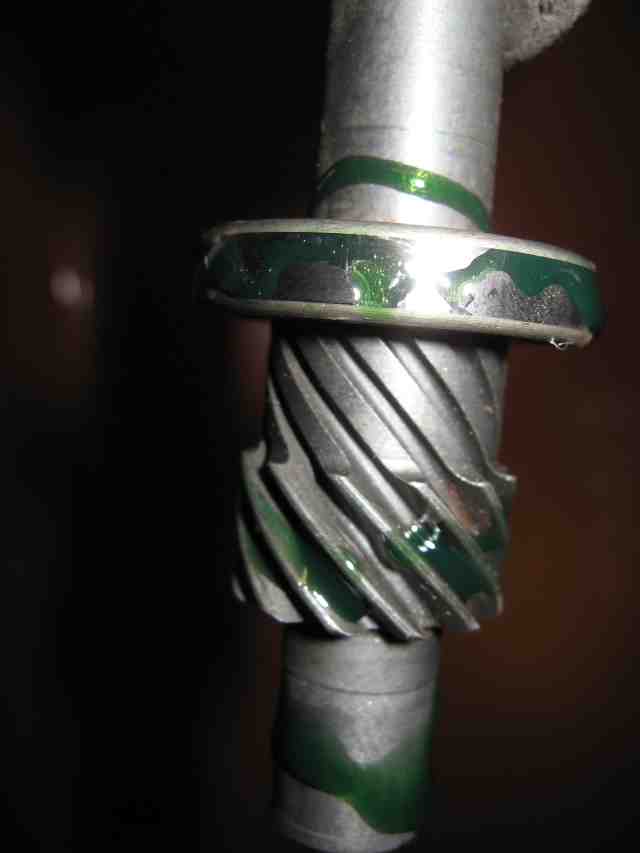
Image

Put on the circlip:
Image

Oil the bearing and gear teeth with assembly oil:
Image

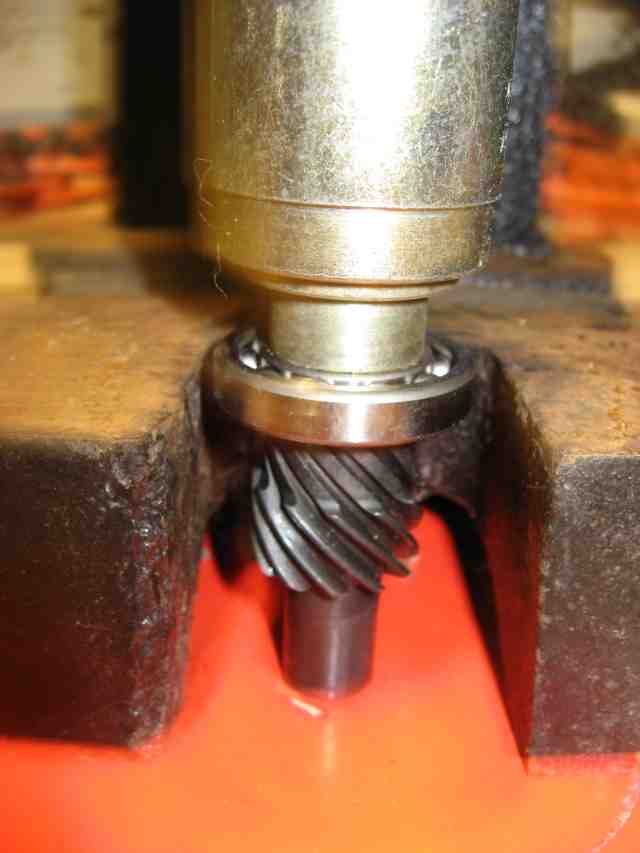
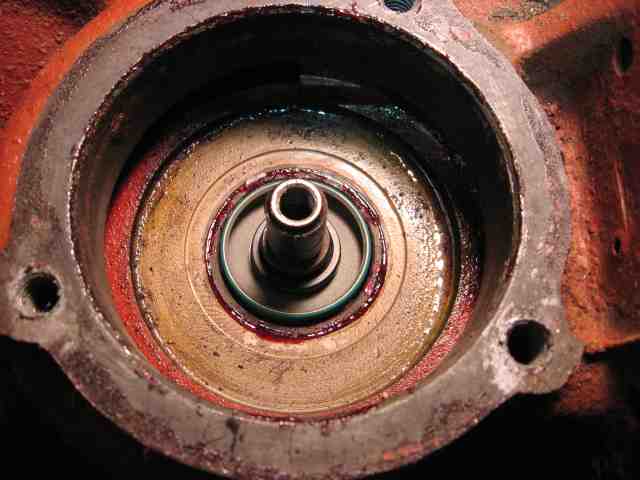
Set the pump into the block:
Image

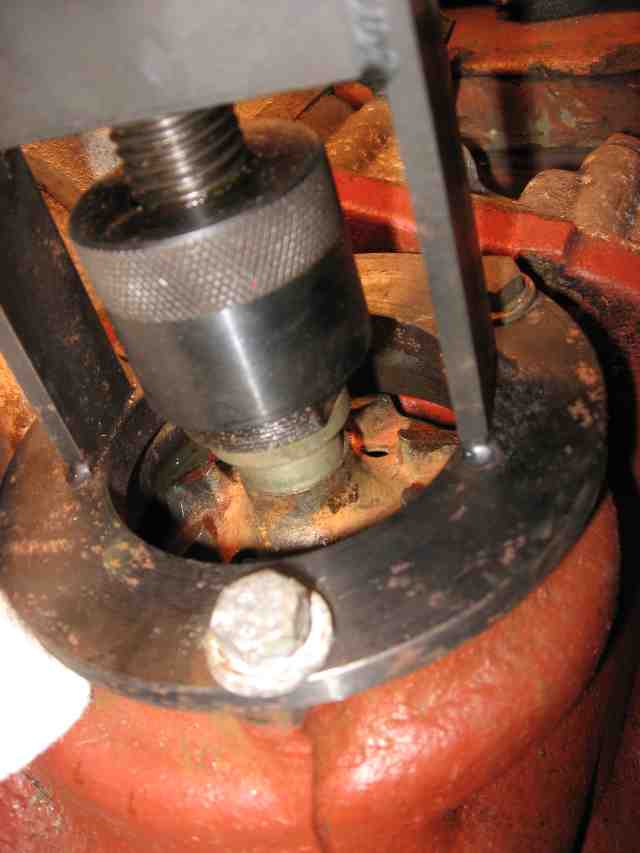
Press the pump down in by only pressing on the outer race of the bearing.
Image

Slip the oil seal on in the orientation shown.
Image

Use the same adapter on the pump tool that was used the press the pump in. Press the oil seal on but do not press hard once the seal stops moving. You don’t want to put too much force down because the metal side of the seal will contact the circlip and you don’t want it to dig in too much.

Image

Put a little Loctite 518 flange sealant under the flange of the water seal.
Image

Set the water seal in place and press it in only contacting the outer flange of the seal.
Image
Image
Image

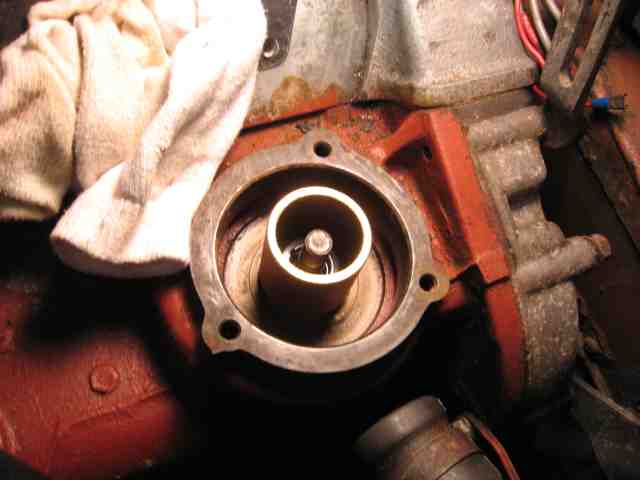
Set the impeller on the pump shaft. Smear a thin layer of grease on the underside of the water pump cover.
Image

Test fit the pump cover. You’ll notice that the cover won’t fit all the way down and the impeller leaves impressions in the grease.
Image

Fit the pump tool and slowly push the impeller on. Go in small steps removing the tool and test fitting the pump cover to check for interference. It will be necessary to remove and refit the pump tool a number of times but it will be worth it in the end. You want the pump cover to be as close to the impeller as possible in order to maximize pump efficiency (99’s need all the help they can get cooling the engine).
Image

As soon as there is no more contact between the pump cover and impeller, clean the grease off the cover and impeller, put some Loctite 518 on the block in place of the cover gasket and fit the pump cover.

Replace the manifold (you can use Loctite 518 in place of the gasket), hoses, and alternator. Let the Loctite 518 cure for a few hours (it is an anaerobic compound and will start curing as soon as it is clamped and there is no oxygen in it’s vicinity). Change the engine oil and re-fill the cooling system.

This one dribbled a little coolant out of the weep hole once it got up to full operating temperature. The dribbling stopped after 5 or 10 minutes. This is typical as the water seal beds into the impeller. These seals are intended to ride against a smooth ceramic surface. A ceramic disk actually comes with the part from McMaster.

Earlier water pumps are enclosed in a brass cage. The only real difference is that all of the parts are inside the cage and there are two o-rings on the outside of the cage. I don’t have one of those water pumps available, otherwise I would have measured the O-rings and included them in the parts list.
Last edited by Geoff on Wed Dec 30, 2009 8:25 am, edited 1 time in total.
The kind of dirty that doesn't wash off :eyebrows:

sonett
Posts: 326
Joined: Sat Jun 30, 2007 11:19 am
Number of Saabs currently owned: 0
Location: UK

Re: B engine water pump rebuild using standard industry parts

Postby sonett » Wed Dec 30, 2009 4:18 am

Nice on Geoff.

Who is the actual manufacturer of the bearing? I have removed quite a few of these water pumps and all of the pumps with 'after market' repair kits using cheap bearings have had bearing failure. I only use top quality bearings for these pumps, SKK being my choice.
'87 900i
'83 99GL
'76 EMS
'00 Evo 6 tme Red
'00 Evo 6 tme Black

User avatar
Geoff
Team Turbo Troll Crew
Posts: 3890
Joined: Fri Oct 20, 2006 3:31 pm
Nickname: Geoff
Number of Saabs currently owned: 6
Location: Nude Humpshire

Re: B engine water pump rebuild using standard industry parts

Postby Geoff » Wed Dec 30, 2009 8:37 am

The bearing manufacturer is NSK Japan. It is supposedly built to the ABEC-3 rating so it should be a decent bearing. It looks on par with the bearing included with my OEM rebuild kit which was one of the last ones produced. I've seen other bearings included with older kits or in pumps I've pulled that were poor quality with a lot of slop.

I tried to source a bearing locally (to see if there were any higher rated ones available) but nobody had them in stock. After looking over the NSK bearing I felt comfortable using it. I figure the price being over three times the price of the next bearing down must mean it's somewhat better too....

RallyHo once had a water pump bearing seize on a freshly rebuild motor causing the shaft to stop, which caused the timing gear on the end of the auxiliary shaft to snap, which caused the valves to smack the pistons and bend. So I won't be using suspect bearings :P

I updated the parts list above with manufacturers names.
The kind of dirty that doesn't wash off :eyebrows:

User avatar
99Super
Posts: 1065
Joined: Wed Jan 24, 2007 5:14 pm
Number of Saabs currently owned: 13
Location: Bend, OR
Contact:

Re: B engine water pump rebuild using standard industry parts

Postby 99Super » Wed Dec 30, 2009 11:40 am

Nice work Geoff!
I've never used the grease/measure bit. I've always just pressed the impeller on until it bottomed out on the shaft...
_______________________________________________
"I don't want no Commies in my car!... No Christians either!"

User avatar
DrewP
Posts: 2084
Joined: Wed Dec 26, 2007 8:27 pm
Nickname: TANK
Number of Saabs currently owned: 1
Location: Monrovia, CA

Re: B engine water pump rebuild using standard industry parts

Postby DrewP » Wed Dec 30, 2009 12:13 pm

99Super wrote:Nice work Geoff!
I've never used the grease/measure bit. I've always just pressed the impeller on until it bottomed out on the shaft...


The early style ones I've done (with the bearing in the brass cage, and a bolt on top) I've found this works fine.

On the later style one with the impeller simply press-fitted to the impeller shaft I broke one if the carbon graphite seals by pushing the impeller down too far. Geoff is deffinitely right about wanting the impeller as close to the pump cover as is practical though, a good a reason as any to not push it on too far.

Thanks for spec'ing that seal Geoff!

Best,
Drew
"You can educate ignorance, but you can't fix stupid."

sonett
Posts: 326
Joined: Sat Jun 30, 2007 11:19 am
Number of Saabs currently owned: 0
Location: UK

Re: B engine water pump rebuild using standard industry parts

Postby sonett » Wed Dec 30, 2009 5:43 pm

Geoff wrote:The bearing manufacturer is NSK Japan. It is supposedly built to the ABEC-3 rating so it should be a decent bearing. It looks on par with the bearing included with my OEM rebuild kit which was one of the last ones produced. I've seen other bearings included with older kits or in pumps I've pulled that were poor quality with a lot of slop.

I tried to source a bearing locally (to see if there were any higher rated ones available) but nobody had them in stock. After looking over the NSK bearing I felt comfortable using it. I figure the price being over three times the price of the next bearing down must mean it's somewhat better too....

RallyHo once had a water pump bearing seize on a freshly rebuild motor causing the shaft to stop, which caused the timing gear on the end of the auxiliary shaft to snap, which caused the valves to smack the pistons and bend. So I won't be using suspect bearings :P

I updated the parts list above with manufacturers names.


NSK are a quality bearing, OEM in most Jap and French cars. ABEC-3 is at the lower end of the precision table. I usually refer to the 'C' grading, this refers to the radial clearance, C1 being the tightest and C5 the loosest. Application is determined by heat and the effect of expansion etc and also interference fit of the inner and outer case. If no reference is made to clearance then the bearing is usually C3 or CN which is between C2 and C3.
'87 900i
'83 99GL
'76 EMS
'00 Evo 6 tme Red
'00 Evo 6 tme Black

DeLorean
Posts: 1193
Joined: Sat Mar 31, 2007 9:54 pm
Number of Saabs currently owned: 9
Location: Pennsylvania, Forever!
Contact:

Re: B engine water pump rebuild using standard industry parts

Postby DeLorean » Thu Dec 31, 2009 10:06 am

So the parts from McMaster, Vs say this-
http://cgi.ebay.com/ebaymotors/Saab-99- ... 4838cfd6ce

Is it a difference of quality in the components? Just wondering cause those ebay rebuild bits sure are cheap.
Less brake more gas!

User avatar
Geoff
Team Turbo Troll Crew
Posts: 3890
Joined: Fri Oct 20, 2006 3:31 pm
Nickname: Geoff
Number of Saabs currently owned: 6
Location: Nude Humpshire

Re: B engine water pump rebuild using standard industry parts

Postby Geoff » Mon Jan 04, 2010 1:03 pm

sonett wrote:NSK are a quality bearing, OEM in most Jap and French cars. ABEC-3 is at the lower end of the precision table. I usually refer to the 'C' grading, this refers to the radial clearance, C1 being the tightest and C5 the loosest. Application is determined by heat and the effect of expansion etc and also interference fit of the inner and outer case. If no reference is made to clearance then the bearing is usually C3 or CN which is between C2 and C3.


I couldn't find any reference to the clearance rating when I bought the bearing and sort of forgot about it after that. I looked back through the pictures of the bearing and at the box it came in, along with at NSK's website. The clearance rating isn't listed anywhere so I just assume its probably a CN (or possibly C3). C3 is for if the difference in temperature between the shaft and the block is 70°F to 140°F and I think C2 is less than 70°F and CN is between the two(?). I figure if its CN it should work fine. :-)
The kind of dirty that doesn't wash off :eyebrows:


Return to “SAAB MOTORSPORT TECH”

Who is online

Users browsing this forum: No registered users and 13 guests