'71 Shell Prep updates
-
Jordan

- Site Admin
- Posts: 4068
- Joined: Fri Oct 13, 2006 2:38 pm
- Number of Saabs currently owned: 6
- Location: Vernon, CT
- Contact:
Re: '71 Shell Prep updates
I'm in the same boat as you... I have two front windscreens and a barely usable gasket.. not even sure it's usable
-
Geoff

- Team Turbo Troll Crew
- Posts: 3891
- Joined: Fri Oct 20, 2006 3:31 pm
- Nickname: Geoff
- Number of Saabs currently owned: 6
- Location: Nude Humpshire
Re: '71 Shell Prep updates
Could a 900 gasket be used if it was cut down? Maybe you can glue it together at the corners? The chrome strip would be a different width but if it didn't leak....
The kind of dirty that doesn't wash off 
-
Crazyswede

- Team Turbo Troll Crew
- Posts: 4540
- Joined: Fri Sep 22, 2006 3:53 pm
- Nickname: Mongo
- Number of Saabs currently owned: 97
- Location: Vermont
- Contact:
-
Jordan
- Site Admin
- Posts: 4068
- Joined: Fri Oct 13, 2006 2:38 pm
- Number of Saabs currently owned: 6
- Location: Vernon, CT
- Contact:
Re: '71 Shell Prep updates
So Geoff stopped by and we were talking about some nifty ways to mount the front air dam. I was thinking of welding some small tabs to the body to attach some quarter turn fasteners.
A couple of concerns I had were about vibration and strength.. I was thinking of having two fasteners in the front and one on each side corner. (How do you fasten the springs? can you weld them?)
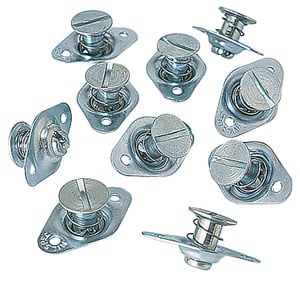
Or this style

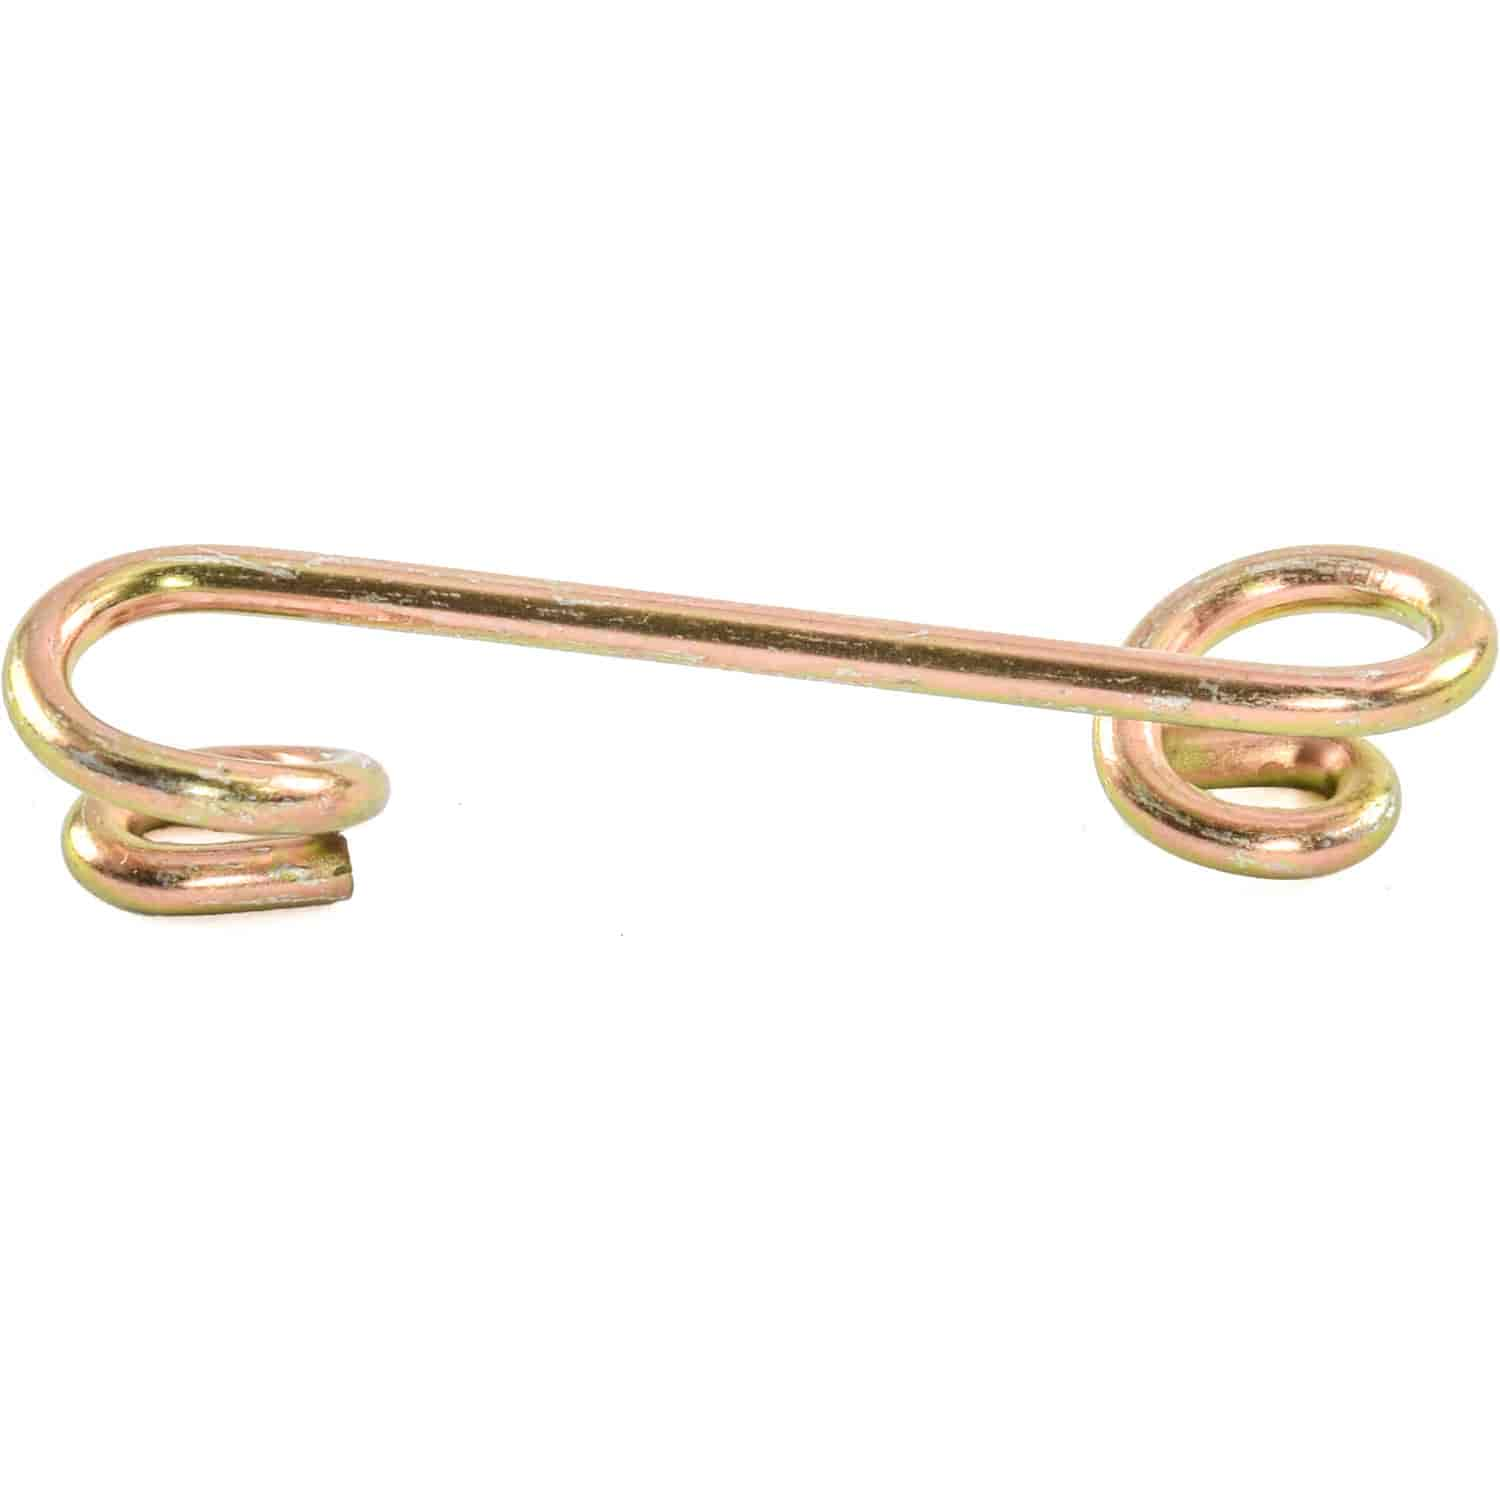
Would that suffice? Or should I use the vibration isolating ones ...

Like this
Any other ideas?
A couple of concerns I had were about vibration and strength.. I was thinking of having two fasteners in the front and one on each side corner. (How do you fasten the springs? can you weld them?)
Or this style
Would that suffice? Or should I use the vibration isolating ones ...
Like this
- 99ad.jpg (42.16 KiB) Viewed 3071 times
Any other ideas?
-
airsweden

- Posts: 756
- Joined: Mon Apr 16, 2007 2:36 pm
- Number of Saabs currently owned: 0
- Location: Oceania
Re: '71 Shell Prep updates
some hinges and springs would be cool. not sure how to go about it but those airdams have never lasted very long in my hands. would be cool to add some room for it to move if a little if whacked.
99 problems but a SAAB ain't 1
-
Jordan
- Site Admin
- Posts: 4068
- Joined: Fri Oct 13, 2006 2:38 pm
- Number of Saabs currently owned: 6
- Location: Vernon, CT
- Contact:
Re: '71 Shell Prep updates
Well the point of the quarter turn would be that if I thought *i could* smash the thing it would be fairly easy to pop on and off. I was just going to weld little tabs onto the body to mount the receptacle and then rivet the fastener to the air dam. Obviously if I'm welding to the body I want to do it before I drop it off for paint!
-
airsweden
- Posts: 756
- Joined: Mon Apr 16, 2007 2:36 pm
- Number of Saabs currently owned: 0
- Location: Oceania
Re: '71 Shell Prep updates
Last time I got one from SAS, it came with crappy little snips of L shaped galv steel. I screwed them to the body in 4 places then used 4 more screws to fix the airdam to them. It was quick and easy to pop off when racing but I still always managed to hit something between here and there. Maybe something made out of mudflap stuff would work better for me. I saw one once that I think was made from an old floormat, looked stock at 50/50.
99 problems but a SAAB ain't 1
-
Geoff
- Team Turbo Troll Crew
- Posts: 3891
- Joined: Fri Oct 20, 2006 3:31 pm
- Nickname: Geoff
- Number of Saabs currently owned: 6
- Location: Nude Humpshire
Re: '71 Shell Prep updates
I have one that a friend built from 1/2" thick rubber with nylon braid reinforcements in the rubber (think of a tire without the steel belt). The material came from a train yard. It works and looks decent but is heavy. I built another out of polypropylene sheet that is light and flexible and if it gets pushed around I just straighten the aluminum supports.
But I'm sure Jordan wants to use his nice new SAS unit.
But I'm sure Jordan wants to use his nice new SAS unit.
The kind of dirty that doesn't wash off
-
Sam

- Posts: 540
- Joined: Mon Mar 26, 2007 10:40 pm
- Nickname: sambone
- Number of Saabs currently owned: 2
- Location: North Fork LI
- Contact:
Re: '71 Shell Prep updates
This car is coming along great. Now that you have been through the worst of it, how do you feel about hand sanding as opposed to chemical or media blast treatments? Do you think it is the best method for keeping out future rust, or would you have done it differently were it a restoration as opposed to a race car?
There is no such thing as too low or too stiff.
-
Jordan
- Site Admin
- Posts: 4068
- Joined: Fri Oct 13, 2006 2:38 pm
- Number of Saabs currently owned: 6
- Location: Vernon, CT
- Contact:
Re: '71 Shell Prep updates
The paint was stripped using chemical stripper and then painted. The sanding was hand block sanded for straitening the body panels after filler and primer. Both kind of suck, but the paint stripping was necessary to fix the previous bodywork which was failing. If you get away with it, just get a DA sander and rough up the current paint , pull/fill any dings/dents and get it resprayed.
-
Jordan
- Site Admin
- Posts: 4068
- Joined: Fri Oct 13, 2006 2:38 pm
- Number of Saabs currently owned: 6
- Location: Vernon, CT
- Contact:
Re: '71 Shell Prep updates
Finally...
Color is a modern mix formula... similar to original, but I think the volume is turned up a little. Should look good with the chrome and flares.
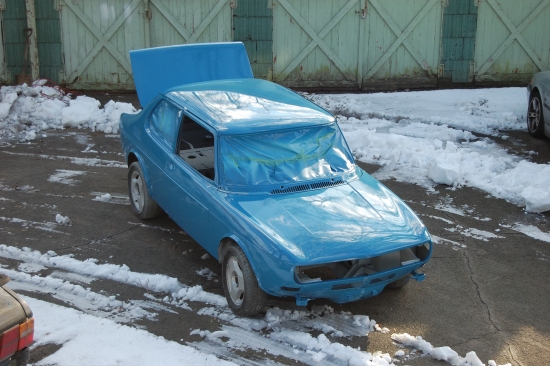


And now the real work begins!
The flares came out really great, but I haven't picked them up yet...
Color is a modern mix formula... similar to original, but I think the volume is turned up a little. Should look good with the chrome and flares.
And now the real work begins!
The flares came out really great, but I haven't picked them up yet...
-
airsweden
- Posts: 756
- Joined: Mon Apr 16, 2007 2:36 pm
- Number of Saabs currently owned: 0
- Location: Oceania
Re: '71 Shell Prep updates
Sweet Dude! Looks awesome! Cant wait for you to get'er going. Next time you come up to VT, we could build a jump in the yard.....
99 problems but a SAAB ain't 1
-
Jordan
- Site Admin
- Posts: 4068
- Joined: Fri Oct 13, 2006 2:38 pm
- Number of Saabs currently owned: 6
- Location: Vernon, CT
- Contact:
Re: '71 Shell Prep updates
All I need is a white roof like on your iceracer and it will look like Papa smurf.
-
paulh
- Posts: 607
- Joined: Wed Mar 21, 2007 10:09 pm
- Number of Saabs currently owned: 2
- Location: Reading, PA
- Contact:
Re: '71 Shell Prep updates
That looks awesome! Definitely needs a white roof and some white wheels 

Paul
Paul
-
Jordan
- Site Admin
- Posts: 4068
- Joined: Fri Oct 13, 2006 2:38 pm
- Number of Saabs currently owned: 6
- Location: Vernon, CT
- Contact:
Re: '71 Shell Prep updates
paulh wrote:That looks awesome! Definitely needs a white roof and some white wheels
Paul
It's not quite as bright in person as it looks in that bottom picture... I think its just the direct sunlight in the photo.
Return to “Projects and Build Threads”
Who is online
Users browsing this forum: No registered users and 1 guest