1991 KTM 125 MX Rebuild / Resto

Post off topic or stuff that otherwise dosen't fit into a specific category here.
User avatar
DrewP
Posts: 2084
Joined: Wed Dec 26, 2007 8:27 pm
Nickname: TANK
Number of Saabs currently owned: 1
Location: Monrovia, CA

1991 KTM 125 MX Rebuild / Resto

Postby DrewP » Tue Mar 06, 2012 12:02 pm

I just picked up my first bike. A couple guys at work ride and have been pestering me to join them out on the trails, so I got looking for a bike. I stumbled on this partially disassembled, but otherwise complete and pretty solid '91 125MX on Craigslist.

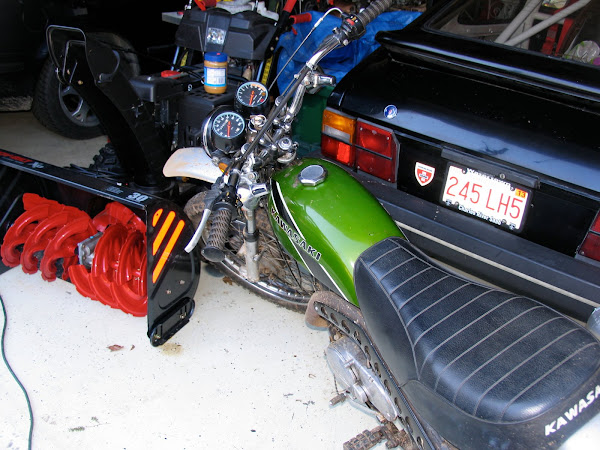
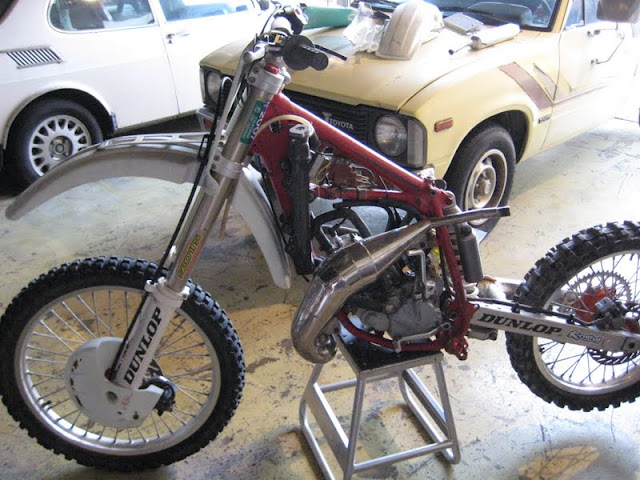
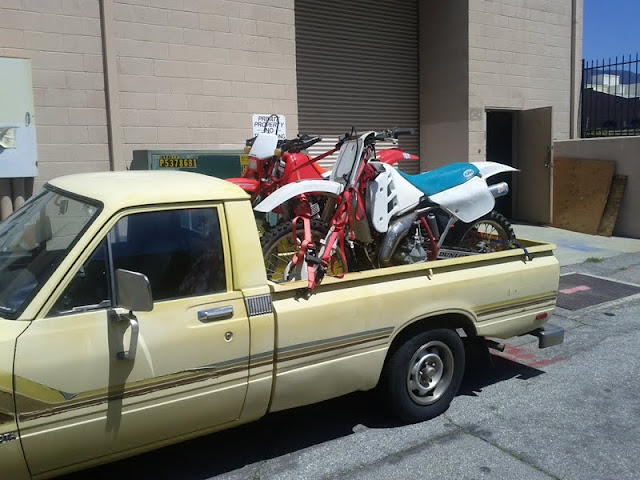
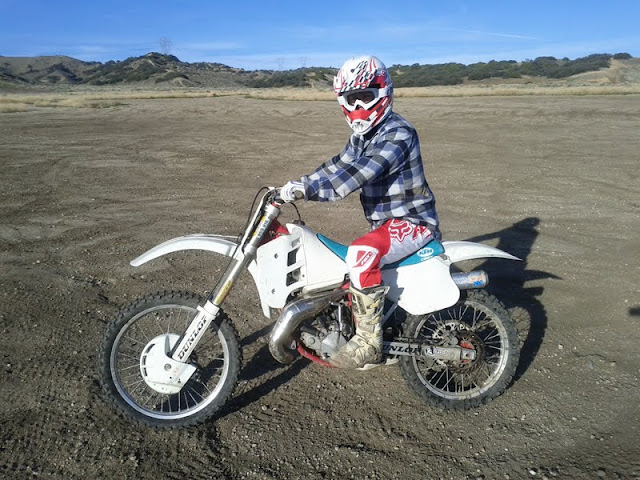
Came with a clean & clear title, and current green sticker (can ride year round in public OHV areas) good through middle of next year.

I paid $350 for it, even with all the work it needs I think I got a good deal.


Image

Image


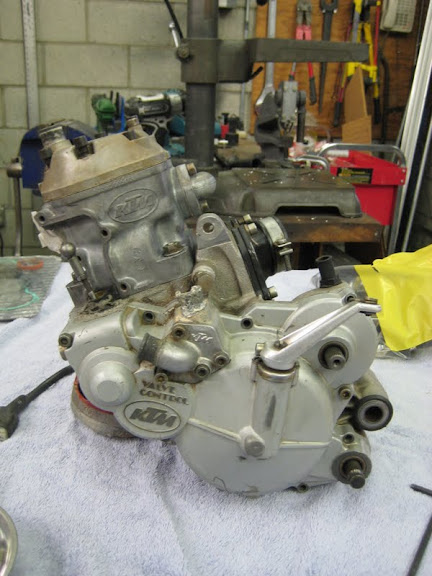
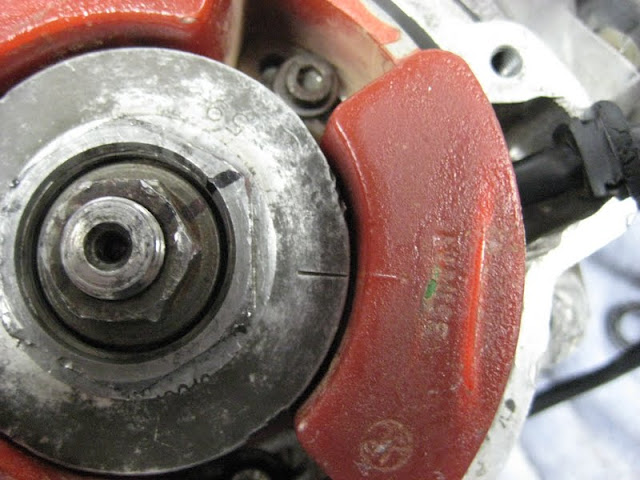
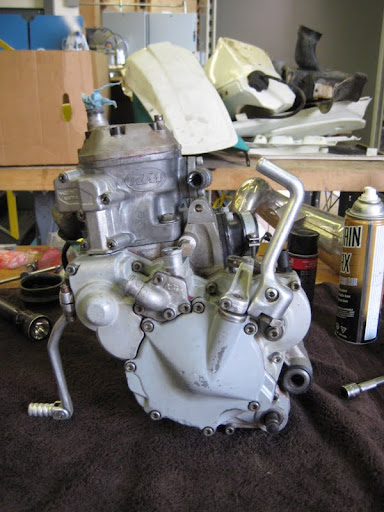
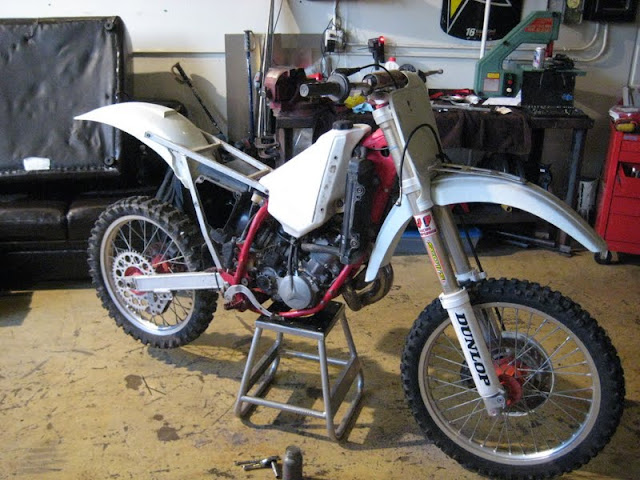
It came with the engine in a box in pieces - side covers loose, flywheel nut loose, but was advertised as having the bottom end already rebuilt at the Malcolm Smith dealership outside LA.

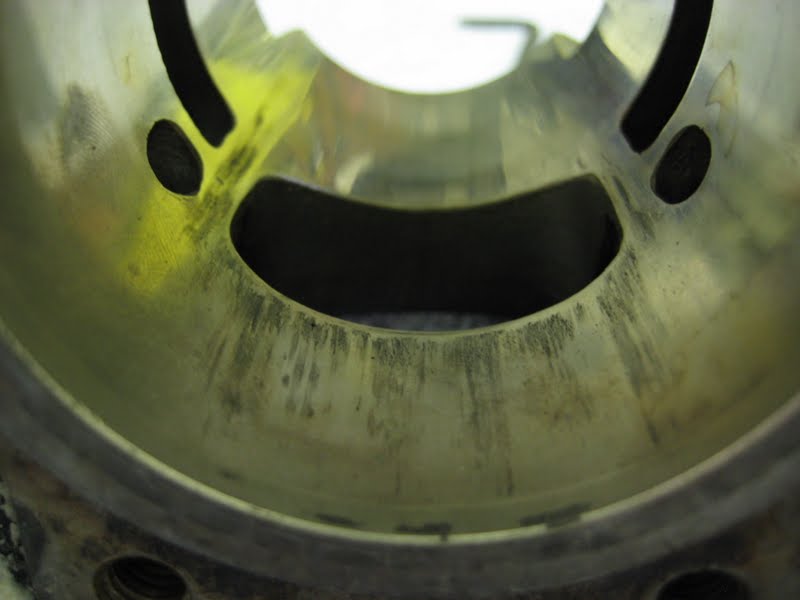
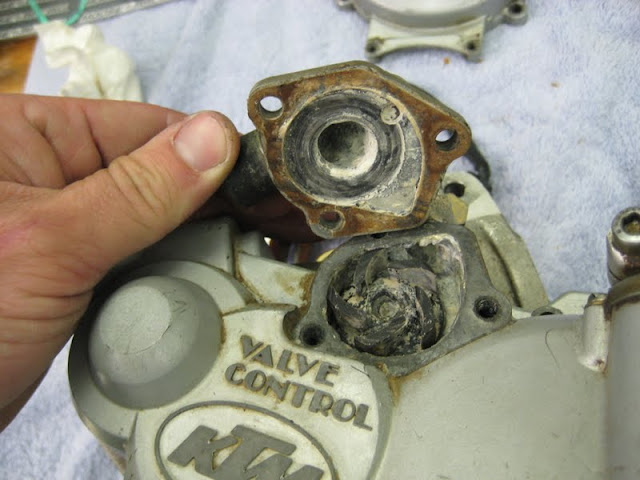
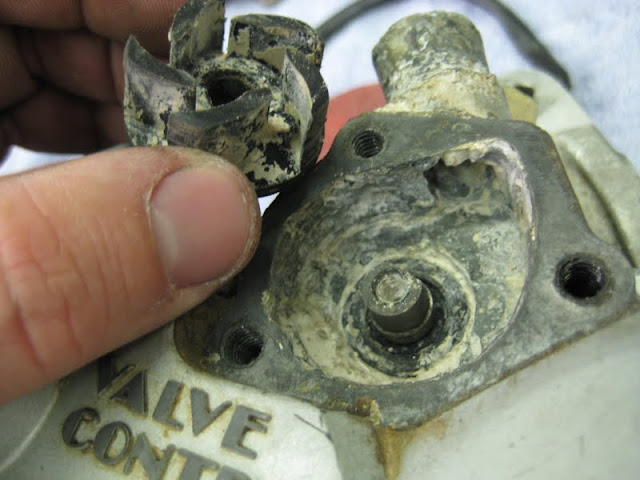
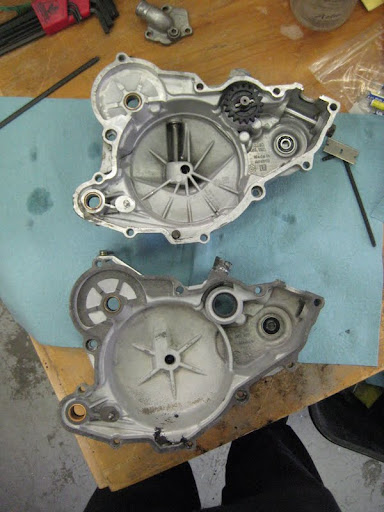
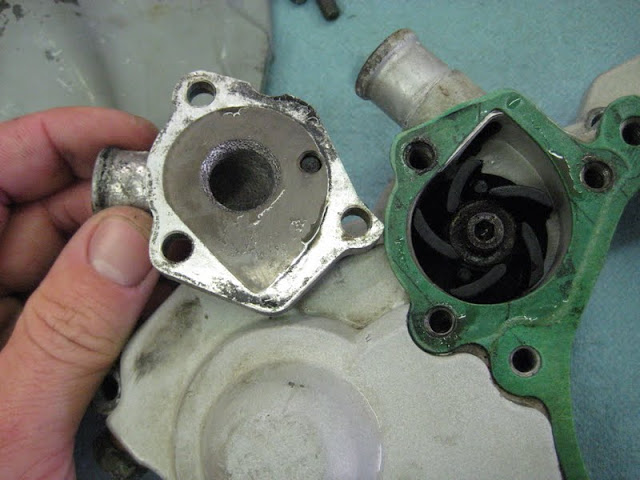
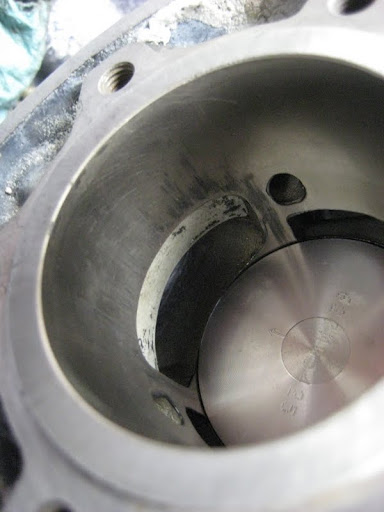
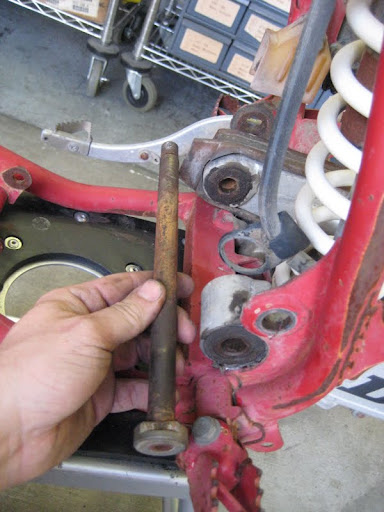
But... the rebuild was about 6 years ago. It has fresh bearings and a new connecting rod, but never had the cylinder put back on. Came with a pretty detonation eroded piston with one skirt broken, and lots of things carboned up. All the water passages are badly corroded, silicone splooged all over the powervalve actuator rod bushing, etc.

Lots of grit down in the crankcase and overall just needs cleaned up.

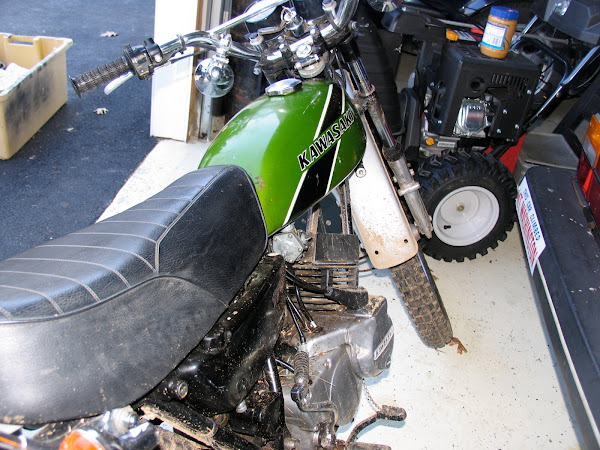
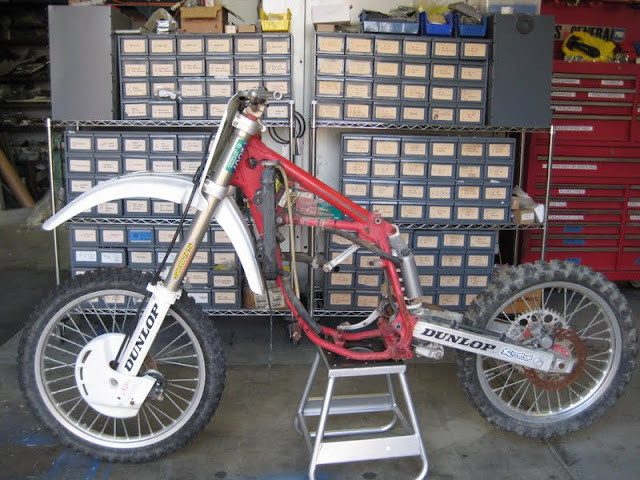
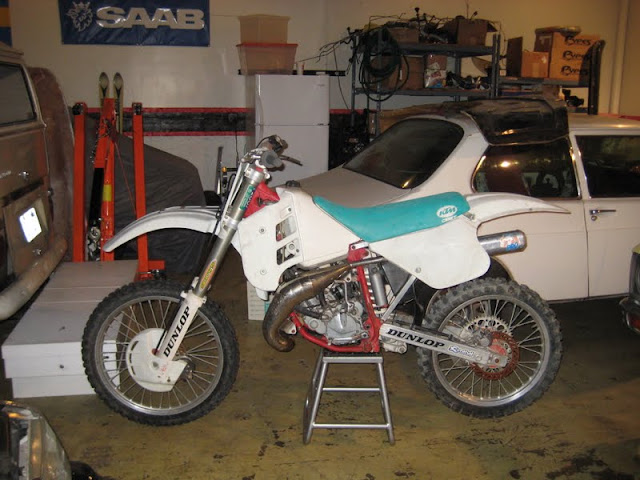
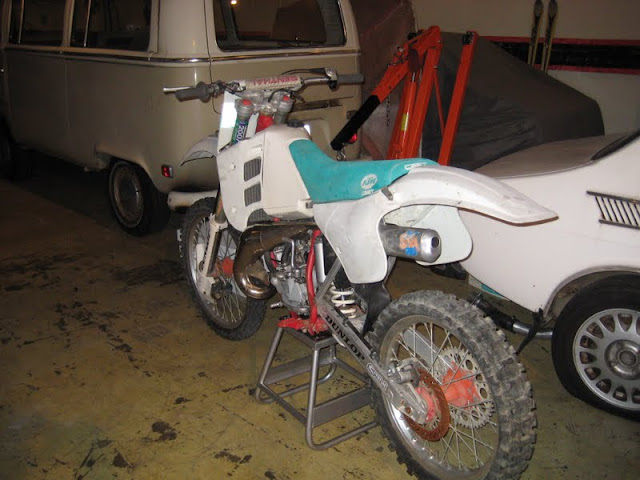
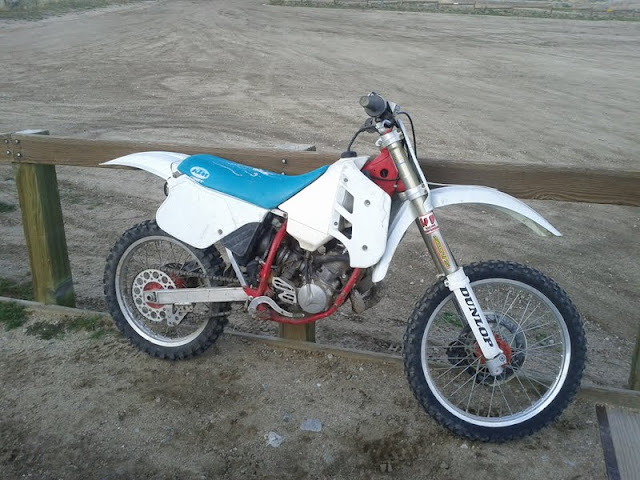
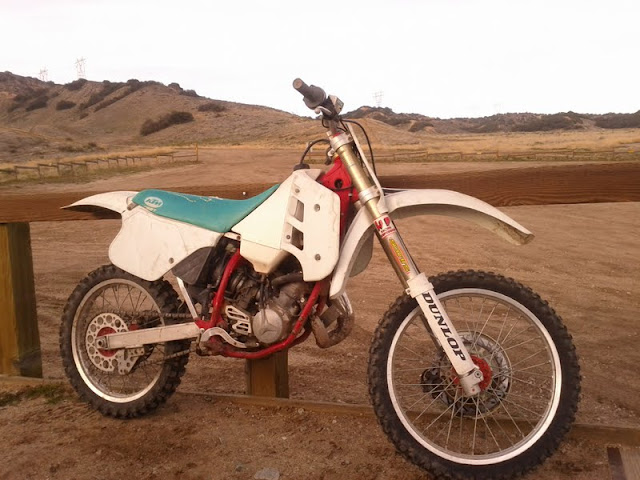
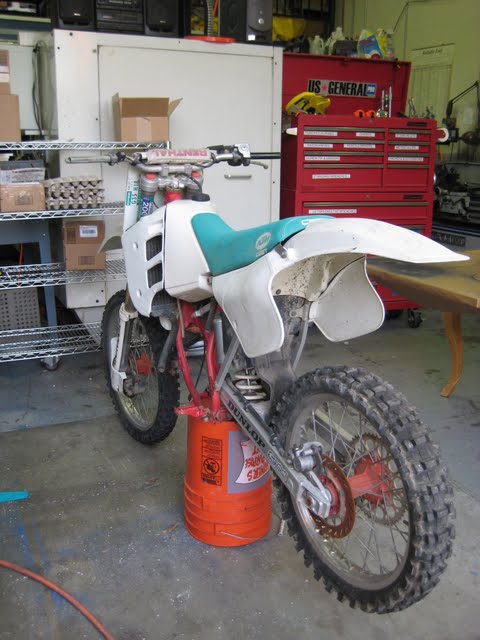
The bike sat outside for some time, the plastics are all pretty brittle and a little crumbly looking, but otherwise it's in nice shape. Doesn't look like it was layed down too much, has good (but old) tires.


****************************************


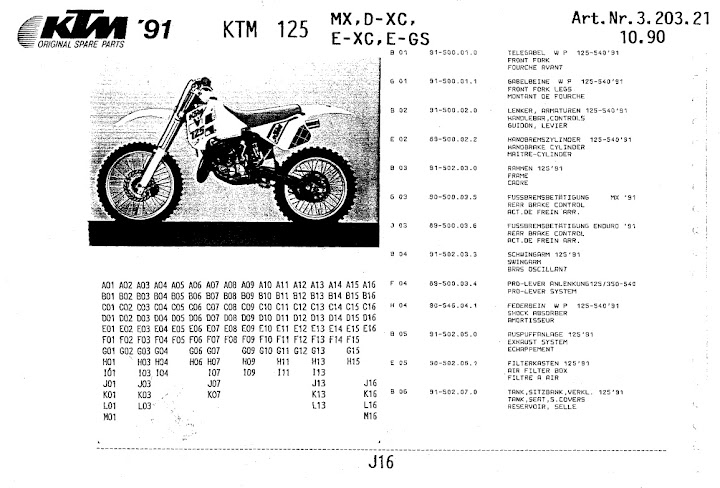
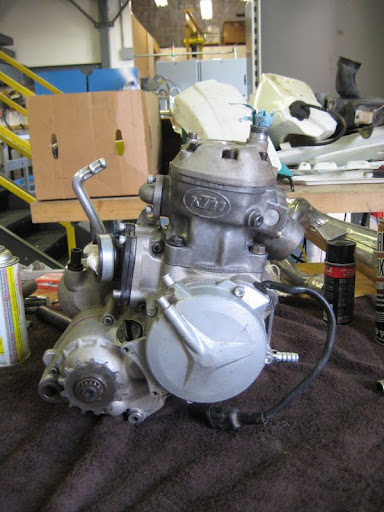
Even by KTMTalk standards this bike is appearing more and more unusual, and I've been struggling to find service info.

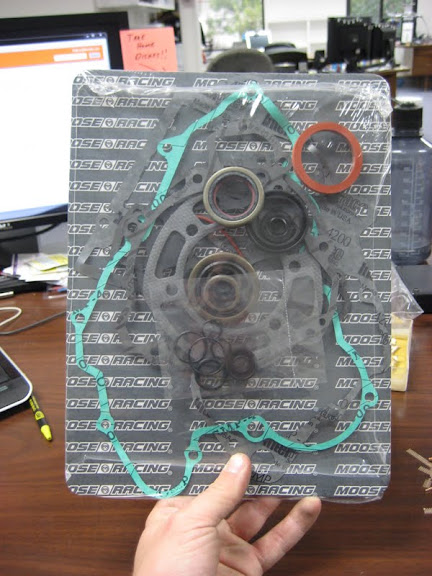
Lots of threads on this generation 250's and 300's, but not much on the 502.xx engined 125's. Gasket kits appear to be almost identical to the 503.xx engined bikes that ran '93-'97 and photos of pistons and things appear to be the same, hope to find some interchange info there as well.


***************************************


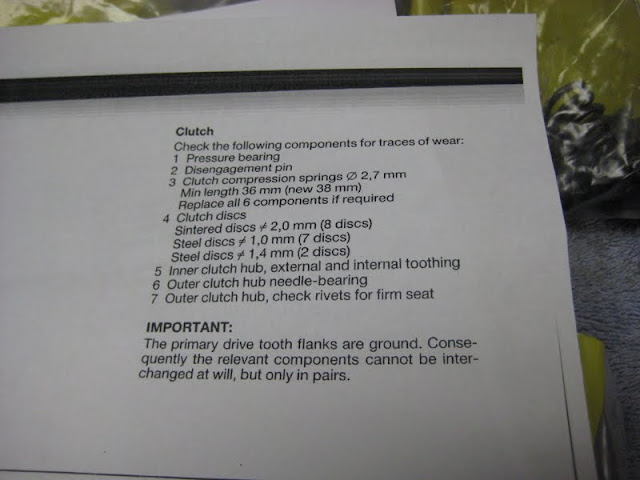
I ordered a factory service manual on CD and am waiting for it to come in, but for now my checklist roughly includes:


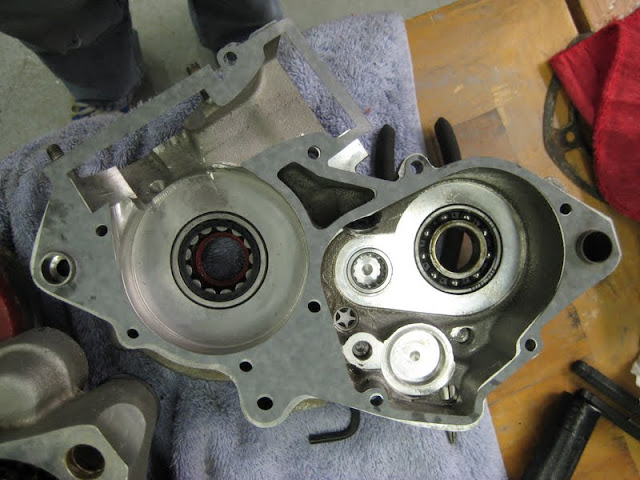
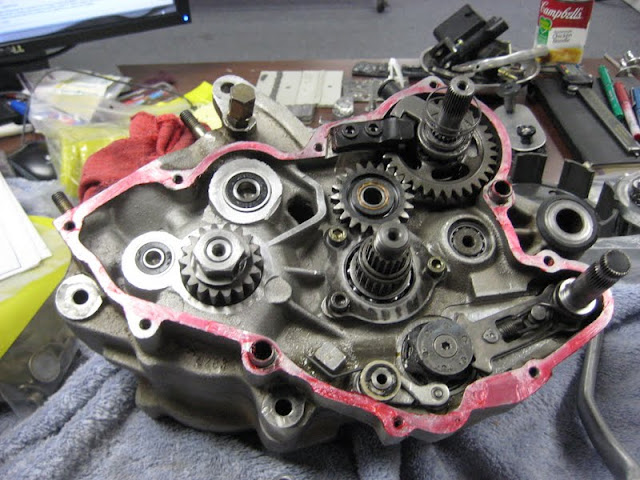
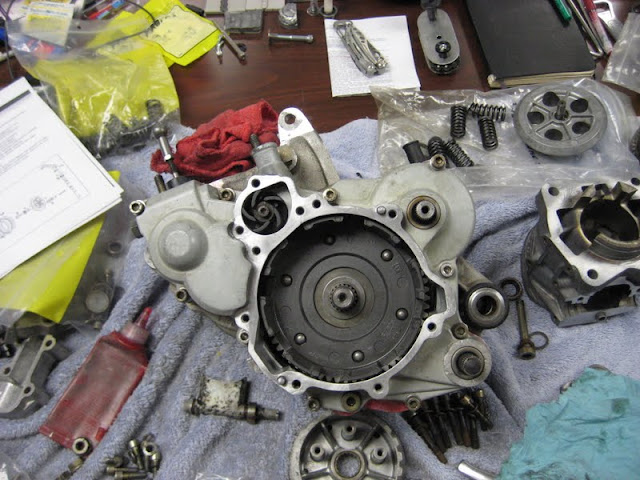
-Disassemble & clean engine, then re-assemble case
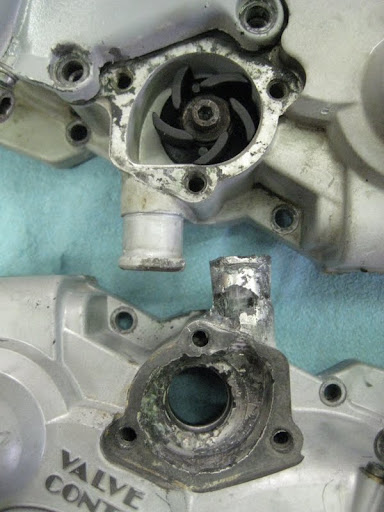
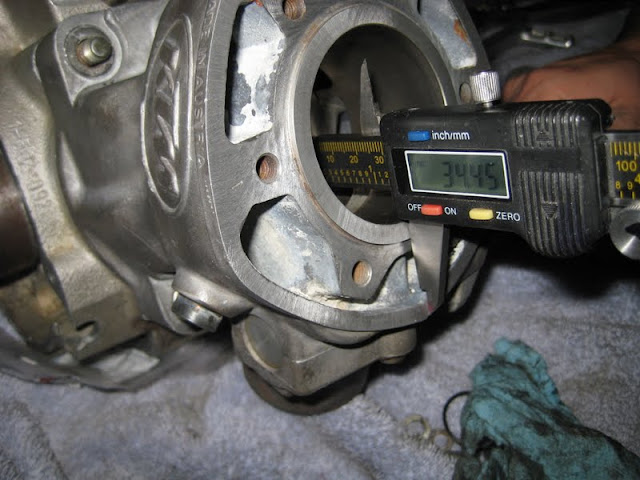
-Ultrasonic clean all case & water cooling parts to break up corrosion
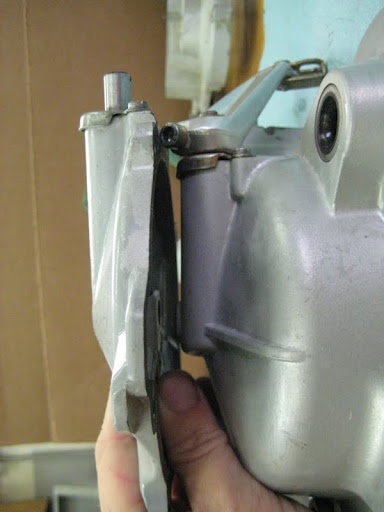
-Weld broken radiator hose spout back together
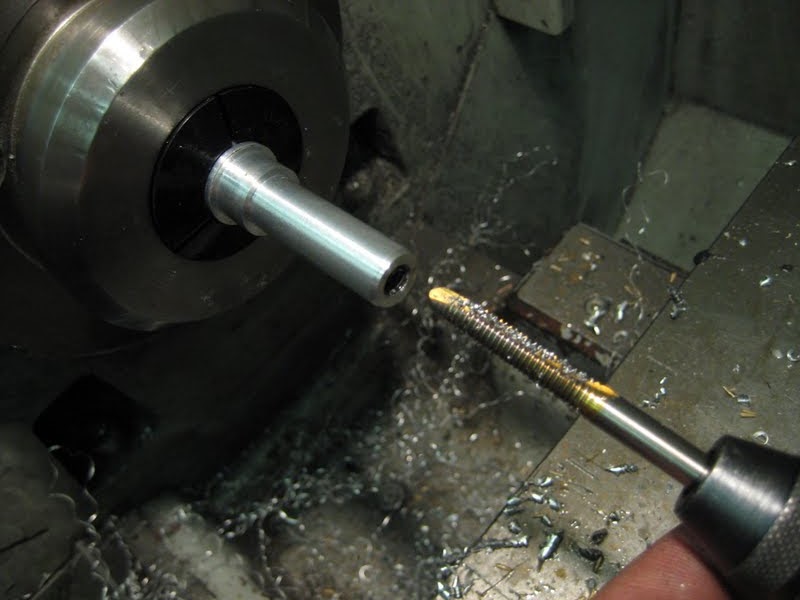
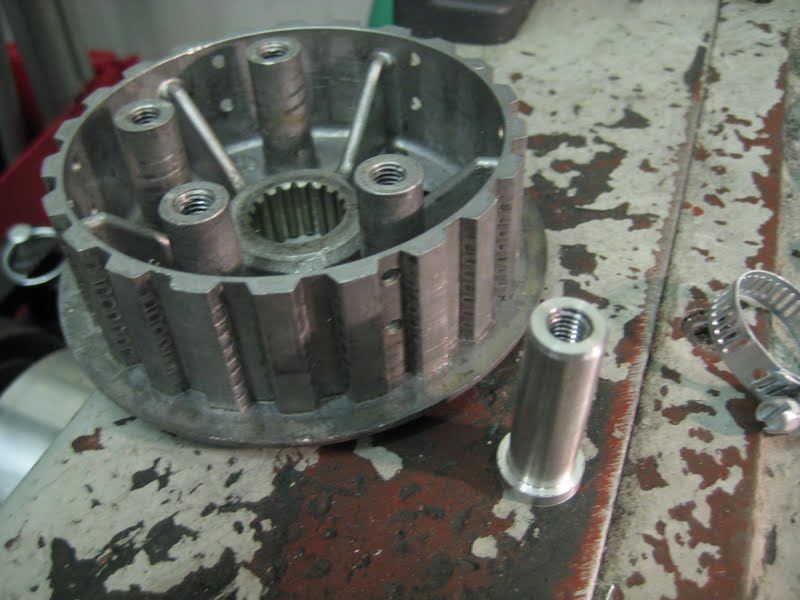
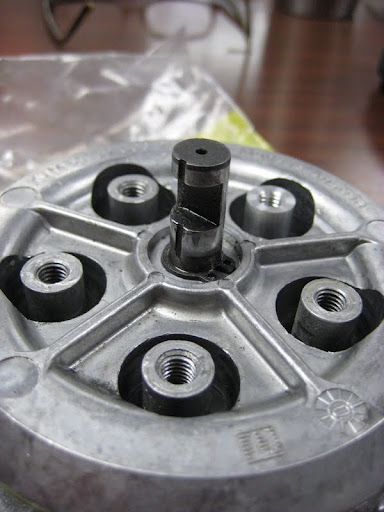
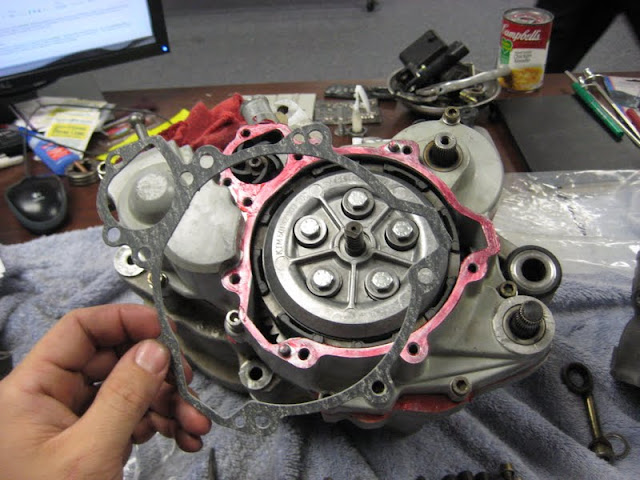
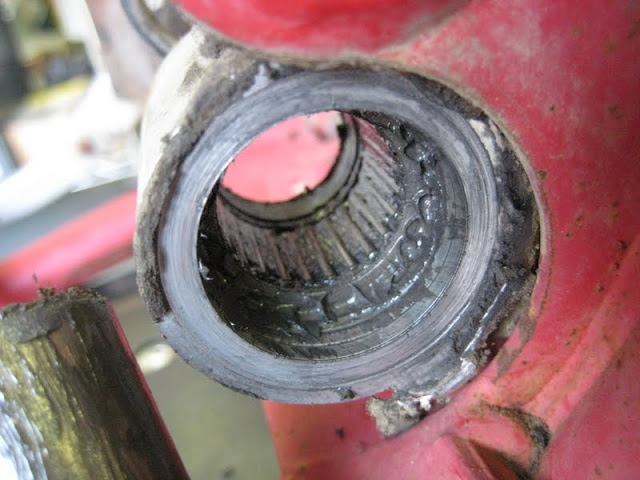
-Make insert for broken bolt riser in clutch basket (one is sheared clean off, only 4 out of 5 bolts were in the clutch)
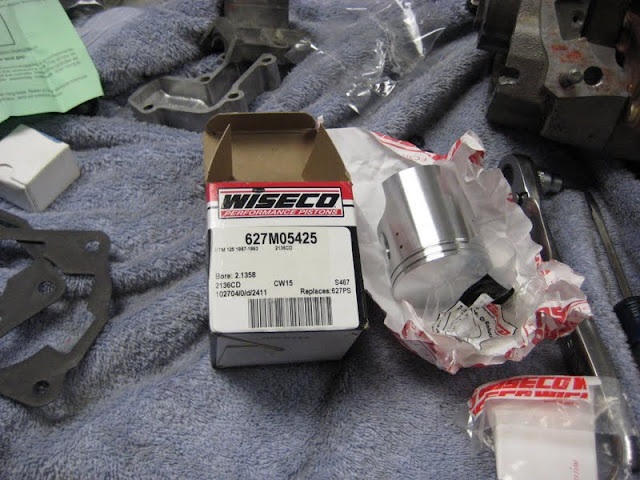
-Reassemble top end with new NOS Wiseco piston kit, scuff up Nikasil cylinder liner that appears in decent shape
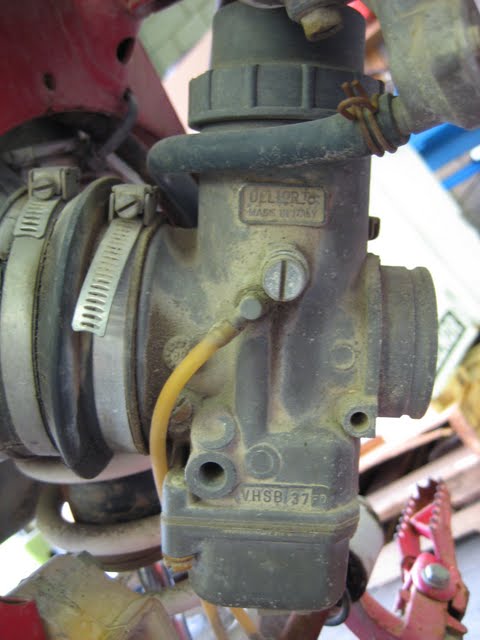
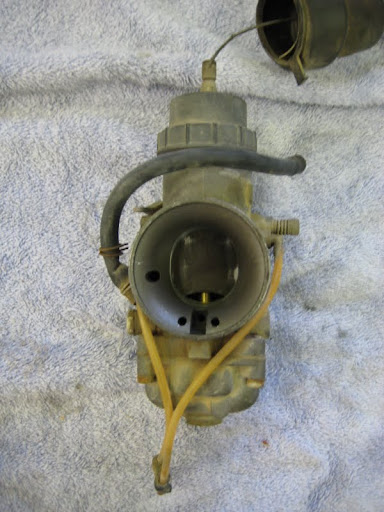
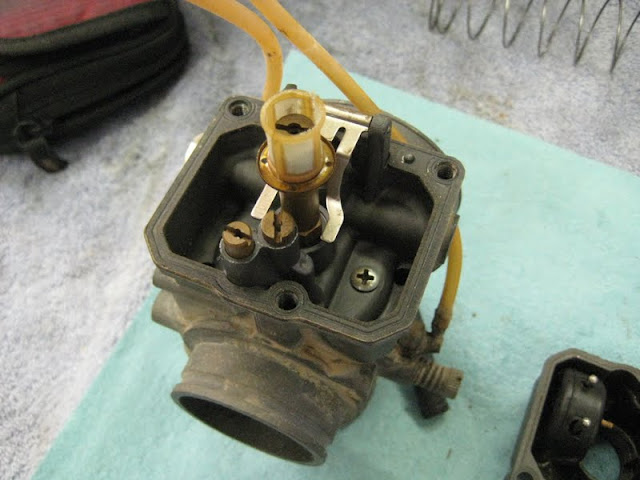
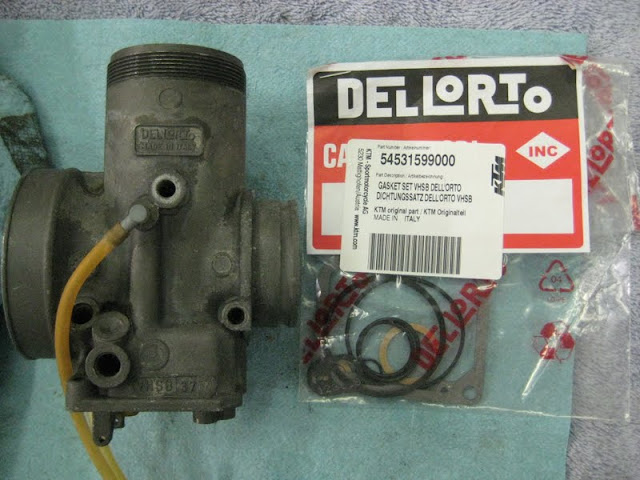
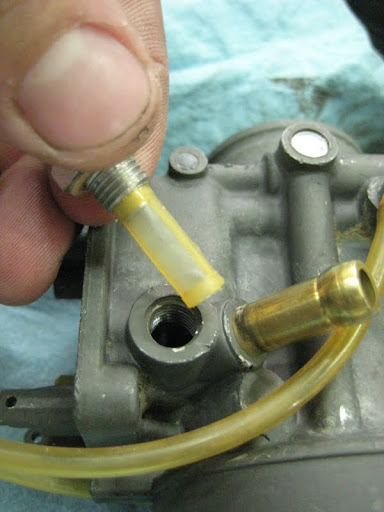
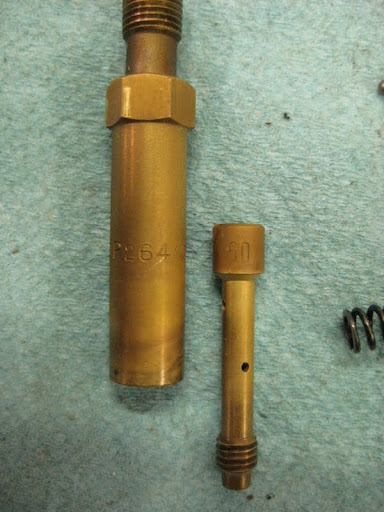
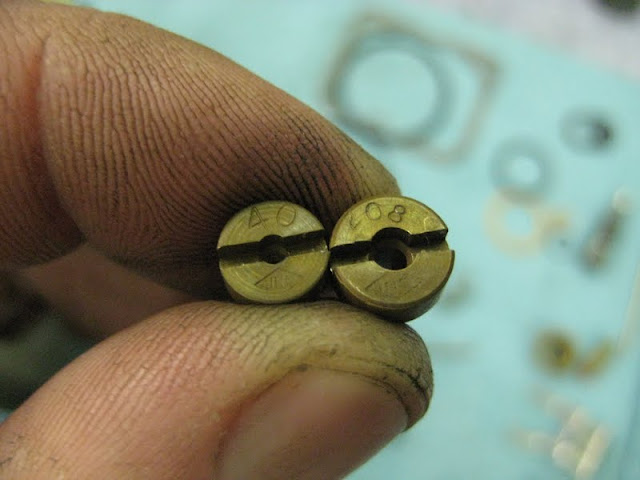
-Rebuild carb, ultrasonic clean all the parts (Delorto 37 VHSB-FD)
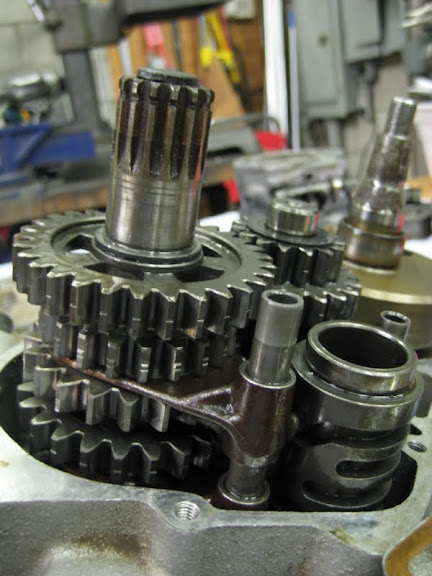
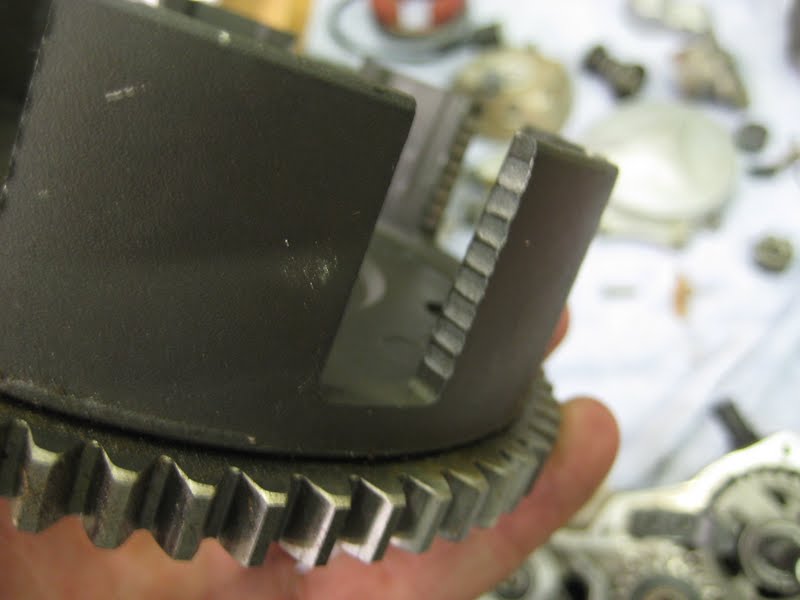
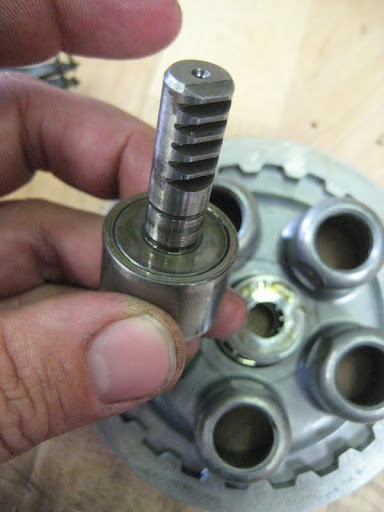
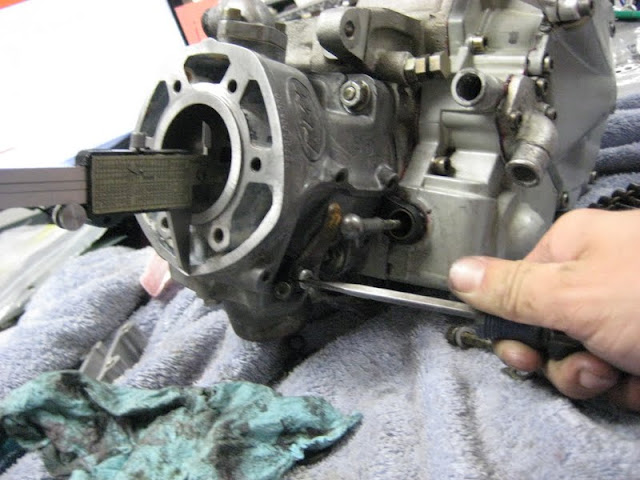
-Adjust powervalve linkage (old mechanical RPM governor gear driven by clutch basket)
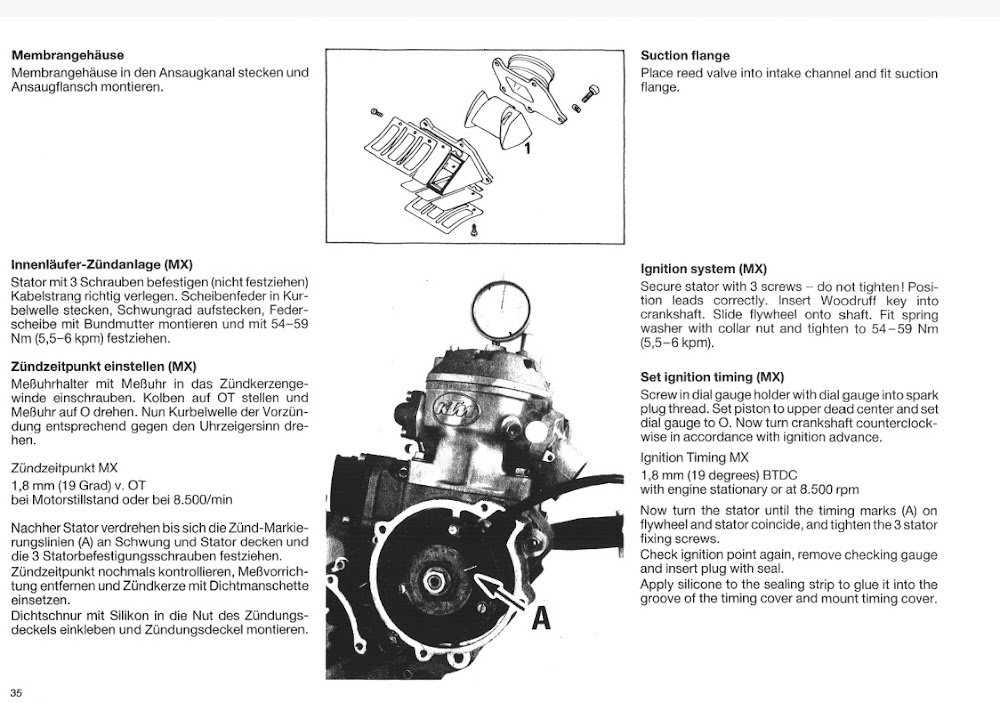
-Set ignition timing (SEM ignition system, no lighting outputs from generator)
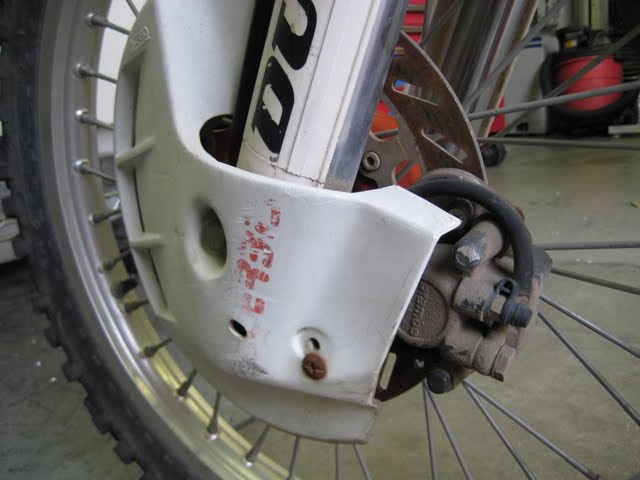
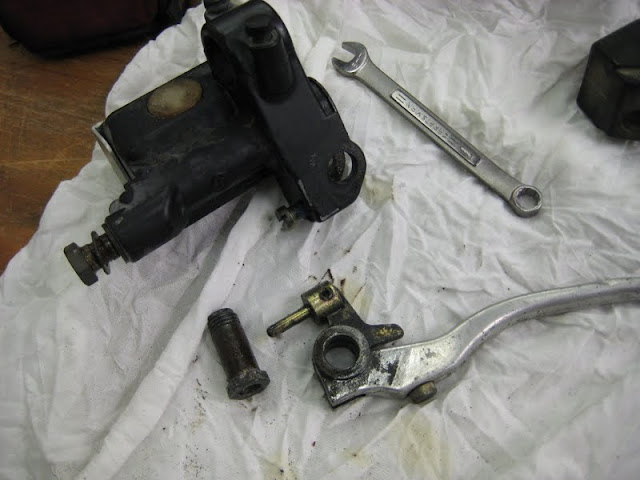
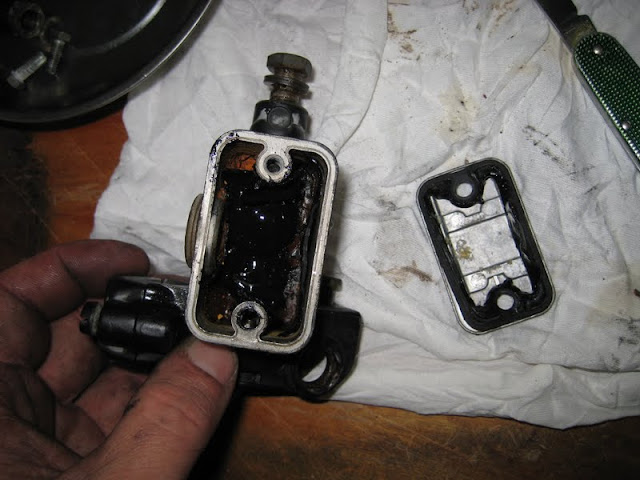
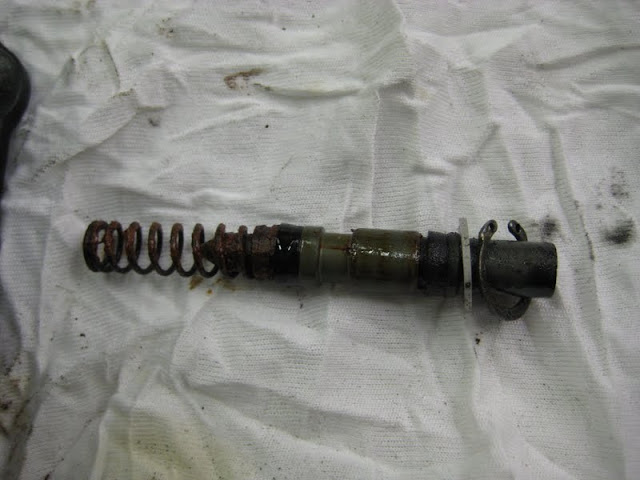
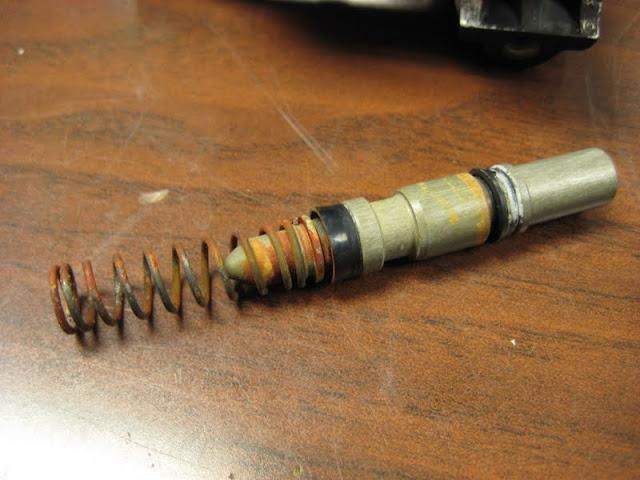
-Rebuild front brake master cylinder - plastic sight glass crumbled away, cylinder sat dry and seals probably shot
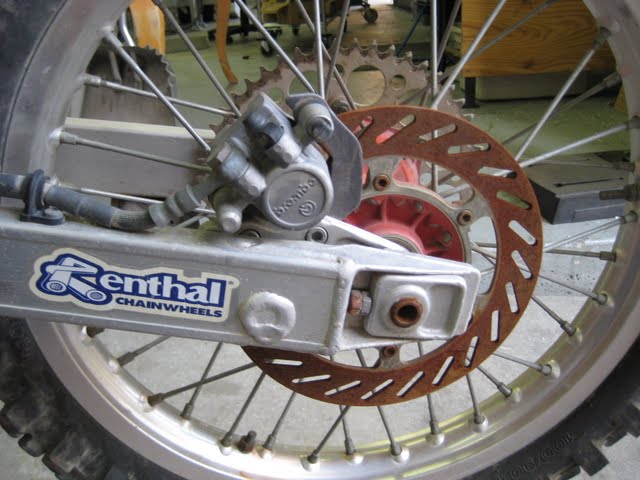
-Un-stick rear caliper - rear brake lever has pressure, but pads don't move in the caliper, hopefully piston just seized up a little and can be lubricated
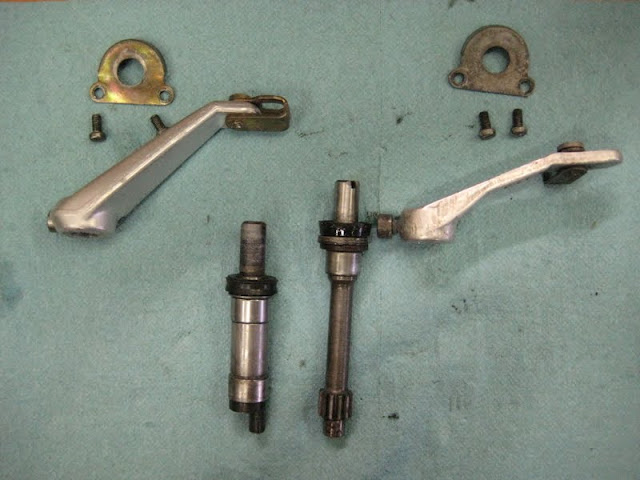
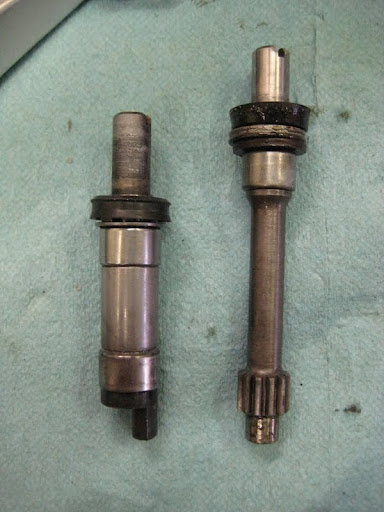
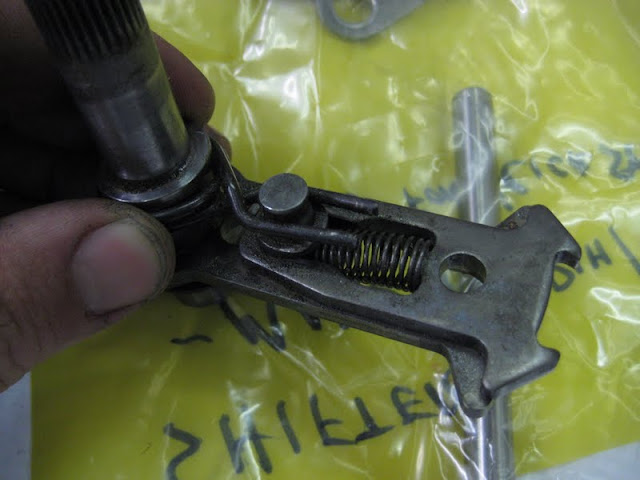
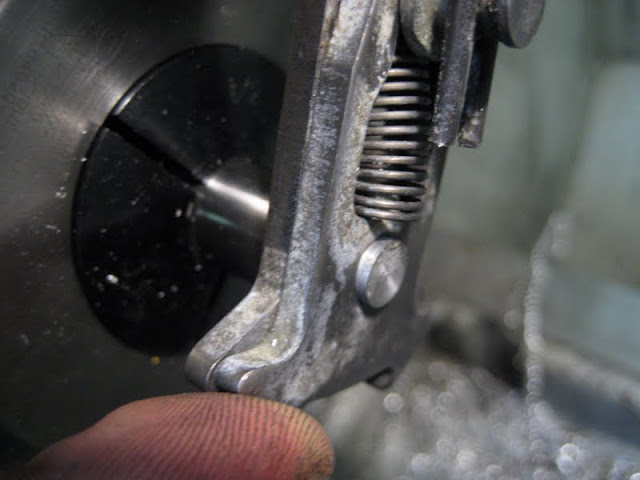
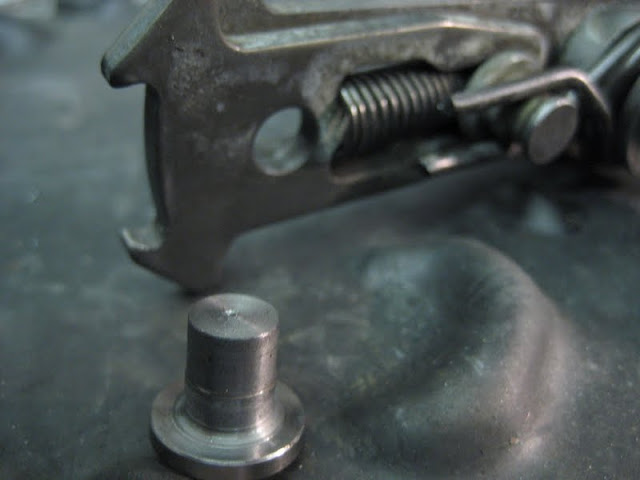
-Make new slide pin for shifter ratchet
-Replace missing spring return for kick starter


Image

Image

Image

Image

Image

Image
"You can educate ignorance, but you can't fix stupid."

User avatar
SwedeSport
Posts: 3021
Joined: Mon Jun 15, 2009 9:52 am
Number of Saabs currently owned: 5
Location: Pottstown, PA
Contact:

Re: 1991 KTM 125 MX Rebuild / Resto

Postby SwedeSport » Tue Mar 06, 2012 12:46 pm

Nice score. Geographical limitations never allowed me to have a dirtbike, but always wanted one. Years later I ended up getting a street bike. Like most of my projects, it sits half finished in the shop.
Swedesport Motors, Apparel and Accessories for SAAB Junkies.
Http://Facebook.com/swedesportmotors
Swedesportmotors@gmail.com

KPAero
Posts: 409
Joined: Thu Feb 11, 2010 6:42 pm
Nickname: Pascal
Number of Saabs currently owned: 2
Location: Ipswich, MA

Re: 1991 KTM 125 MX Rebuild / Resto

Postby KPAero » Tue Mar 06, 2012 5:29 pm

Very nice! Looks like a good buy, should be fun. My brothers and I also recently picked up a bike. There are a bunch of trails that right off our yard in the house we moved into a couple years ago in NH. Luckily we were offered the bike in return for some labor cutting up and moving a bunch of big logs. Anyway, we ended up with this 1973 Kawasaki F7 Enduro. It's in nice shape, the only issues are it needs a battery and the seal in the fuel petcock leaks slowly so we can't put it away with much left in the tank.
Image
I had just taken it out, so its a bit dirty here.
Image
Image
The only issue is it would be more fun with two.

User avatar
DrewP
Posts: 2084
Joined: Wed Dec 26, 2007 8:27 pm
Nickname: TANK
Number of Saabs currently owned: 1
Location: Monrovia, CA

Re: 1991 KTM 125 MX Rebuild / Resto

Postby DrewP » Tue Mar 06, 2012 6:13 pm

That Kawi is awesome! Definitely more fun with a pair - I went trail riding for the first time 2 weeks ago with a guy from work who lent me one of his extras and chased him around. Took me about 10 minutes to feel comfortable on the bike, and 10 more minutes before I wanted to go fast, and 10 more minutes before I ate it the first time. Tons of fun.

So far it's been easier to find parts for the 99 than my KTM.

Hell, it was easier to find parts for the '83 GTV-6. They were cheaper too. :thumbsdown:
"You can educate ignorance, but you can't fix stupid."

User avatar
DrewP
Posts: 2084
Joined: Wed Dec 26, 2007 8:27 pm
Nickname: TANK
Number of Saabs currently owned: 1
Location: Monrovia, CA

Re: 1991 KTM 125 MX Rebuild / Resto

Postby DrewP » Tue Mar 13, 2012 2:57 pm

Got some parts in and some work done.

My gasket set finally showed up, so I split the case halves to clean out any dirt or junk that would have found it's way down around the crank from it sitting with the jug off for so long.

The Moose kit had everything needed, but the gaskets weren't quite a perfect fit. Fit enough, but not perfect. Some 518 on the sealing faces of the transmission on re-assembly made me feel better.


Image

Image


Adorable little stretch bolts for the cylinder head.

Image


Nikasil plated cylinder actually looks worse in the photo than real, can barely feel any of the surface imperfection, I'm not going to address it for now.

Image


New rod still has jelly cover over small end bore to keep it clean:

Image


Clutch side - lots going on. Shifter, kick starter & 1-way ratchet, water pump drive gear, and power-valve governor drive all in here.

Image


Trans

Image

Image

Image


Clutch parts needed some work. The basket looks very useable, but the hub has one of the spring bosses for the pressure plate broken off. I made a press-in insert to repair it, in true "I-can-has-free-machine-shop-access" fashion.

Image

Image

Image

Image

Image

Image
"You can educate ignorance, but you can't fix stupid."

KPAero
Posts: 409
Joined: Thu Feb 11, 2010 6:42 pm
Nickname: Pascal
Number of Saabs currently owned: 2
Location: Ipswich, MA

Re: 1991 KTM 125 MX Rebuild / Resto

Postby KPAero » Wed Mar 14, 2012 11:27 am

Nice work, the insert looks like a good solution. We ended up picking up a second bike, a Kawasaki KE100. Craigslist deal, ended up paying $300. Issues with it are a lack of a battery so the lights don't work. Someone removed the silencer at the end of the exhaust so its a bit loud. And it seams like the front forks could maybe use a rebuild. It is definitely more fun with two, went out for a nice long ride last weekend. Im hoping the KE will run a little better with the rear silencer installed, and it struggled a bit in the snow/mud with a worn rear tire. Good news is that they made the bike from 76-2001, so parts are easy to get. I dont have a picture, but it looks like this except more "used".
Image

User avatar
DrewP
Posts: 2084
Joined: Wed Dec 26, 2007 8:27 pm
Nickname: TANK
Number of Saabs currently owned: 1
Location: Monrovia, CA

Re: 1991 KTM 125 MX Rebuild / Resto

Postby DrewP » Wed Mar 14, 2012 12:14 pm

Sweet.

There was a guy on the KTM forum who made himself some quick & dirty studded snows with sheet metal screws.

Left the tire outside overnight to get chilled nice & cool and drilled through all the knobs, long sheet metal screw in from the inside, nut on the outside. Cut up an old tube to use as a 'cushion' between the tire and the tube you're going to inflate, and voila.

Just don't endo and get run over with it - that's leave a mark.
"You can educate ignorance, but you can't fix stupid."

User avatar
Crazyswede
Team Turbo Troll Crew
Posts: 4540
Joined: Fri Sep 22, 2006 3:53 pm
Nickname: Mongo
Number of Saabs currently owned: 97
Location: Vermont
Contact:

Re: 1991 KTM 125 MX Rebuild / Resto

Postby Crazyswede » Wed Mar 14, 2012 3:23 pm

DrewP wrote:Sweet.

There was a guy on the KTM forum who made himself some quick & dirty studded snows with sheet metal screws.

Left the tire outside overnight to get chilled nice & cool and drilled through all the knobs, long sheet metal screw in from the inside, nut on the outside. Cut up an old tube to use as a 'cushion' between the tire and the tube you're going to inflate, and voila.

Just don't endo and get run over with it - that's leave a mark.


I have friends who make their own spiked woods tires using a car style stud gun and the Kenda trakmaster tires. The tires are inexpensive and support studs well.
I am the 73%

User avatar
DrewP
Posts: 2084
Joined: Wed Dec 26, 2007 8:27 pm
Nickname: TANK
Number of Saabs currently owned: 1
Location: Monrovia, CA

Re: 1991 KTM 125 MX Rebuild / Resto

Postby DrewP » Wed Apr 11, 2012 4:05 pm

Lots of work and lots of time not posting later....

The saga of the clutch side cover:


Happily, I found no debris or grit down inside the crankcase. YAY.


Image


Sadly, I found horrible horrible corrosion in the clutch side cover at the water pump boss, and around the water pump shaft seal.

Image

Image


I tried to clean it up as best I could, thinking I could weld material back onto the bosses and build it back up, but the more I chipped off I found that someone had already slathered the whole inside of the pump housing and hose spout with JB Weld.

It all just flaked off, not much metal left. You can see how damaged the water seal seat is here.


Image


Luckily some internet sleuthing and comparing lots of part #'s showed that a '92-'97 side cover should fit fine! The gaskets are the same, and all the powervalve actuator, water pump, kick-start, and shifter parts are identical.

So I got a used side cover set from a '97.

The '92-'97 covers have the huge advantage of also having a separate clutch basket access cover, so you don't have to pull the entire side cover off just to access the clutch.

The part number for the early cover is 502.30.001.100

The part number for the later outer side cover is 502.30.001.200, and the clutch cover is 502.30.101.200


Neat.

Image

Image


Water pump in new cover is freakin' awesome. Popped in a new seal while it was apart and dropped it on.

Fits perfect.

Image

Image

Image


UN-fortunately....

The new side cover has a different clutch pressure plate release finger.

I thought from looking at photos I could just swap them.

My '91 release finger looks like this, a little cam drive:

Image


But '92-'97 bikes use this style with the little gear teeth:

Image


You can't just swap the release shafts, because they are a different length, AND use different diameter bearings, AND the release arms have different offsets.

Awesome

Image

Image

Image


So I ended up just buying a complete used later style clutch basket for less than buying the toothed release nut new, so now I have a spare basket, hub, and set of springs.

Early release nut with cam: 502.32.017.000

Late release nut with teeth: 503.32.017.000


Image


Good news finally - my clutch (still sintered fiber discs) are practically brand new, spec is for the discs to be 2.0mm thick, and mine were right about there across the board, as were the metal separators:

Image

Image
"You can educate ignorance, but you can't fix stupid."

KPAero
Posts: 409
Joined: Thu Feb 11, 2010 6:42 pm
Nickname: Pascal
Number of Saabs currently owned: 2
Location: Ipswich, MA

Re: 1991 KTM 125 MX Rebuild / Resto

Postby KPAero » Thu Apr 12, 2012 6:33 pm

Eww, that corrosion is nasty. Looks like it had salt water in it!

Looks like your getting closer to putting it back together? Should be nice when it's done.

User avatar
DrewP
Posts: 2084
Joined: Wed Dec 26, 2007 8:27 pm
Nickname: TANK
Number of Saabs currently owned: 1
Location: Monrovia, CA

Re: 1991 KTM 125 MX Rebuild / Resto

Postby DrewP » Thu Apr 12, 2012 6:42 pm

I've actually got it all together and rode it for the first time yesterday after work, I'm just pacing myself putting up some posts about it so I don't spend hours doing it all at once....
"You can educate ignorance, but you can't fix stupid."

User avatar
DrewP
Posts: 2084
Joined: Wed Dec 26, 2007 8:27 pm
Nickname: TANK
Number of Saabs currently owned: 1
Location: Monrovia, CA

Re: 1991 KTM 125 MX Rebuild / Resto

Postby DrewP » Wed Apr 18, 2012 11:43 am

From one of the motorbike guys:


I especially like how you document everything with part numbers. On these internet forums we tend to get a lot of "you can use the Yamaha seal" sort of stuff without any real helpful information. And, you are right, there's not nearly as much 125cc info in this older bike forum.


Thanks! I come from a background of working on pretty unusual cars, and the online community for racing the old SAABs runs basically that way, where we have to share part interchange info or vendors, or names of guys who have stashes squirreled away.

Hopefully some of this info makes it easier for someone else down the line, part of what's taken me so long getting it together was just the amount of information I had to sift through.


To the reciprocating bits!

Found a guy on eBay selling Wiseco top end kits for this guy, it looks like Wiseco might have discontinued them, and I wasn't sure about getting a Vertex kit or not. Saw a few posts from people saying they sort of explode.... so I went with a brand I recognized. I think I paid about $180 for this with a top end gasket kit.


Image


The geometry looks just like the Mahle piston that came broken with the engine, except this one has two ring lands instead of one like on the stock piston.

Image

Image


Since my bike already had a new rod installed when the crank was rebuilt I just had to peel off the wax & had fresh new small-end bore.

Image

Image


Piston go to your home!

Image

Image
"You can educate ignorance, but you can't fix stupid."

User avatar
DrewP
Posts: 2084
Joined: Wed Dec 26, 2007 8:27 pm
Nickname: TANK
Number of Saabs currently owned: 1
Location: Monrovia, CA

Re: 1991 KTM 125 MX Rebuild / Resto

Postby DrewP » Wed Apr 18, 2012 11:43 am

One thing worth noting: the Moose gasket set that I bought only came with one thickness base gasket. The Wiseco kit came with two different thicknesses, so I was able to dial in 'Dimension X' pretty close, but order some spares if you've only got the one top end kit to dial it in.


Fine adjustments, powervalve & timing WITHOUT the factory tools:


On the really old parts microfiche there tends to be more information than just the part numbers, generally a description, and sometimes measurements (for example rather than just a part # for a bolt, it may list something like M6x1x35 or something like that).

I think this microfiche I got from the free download section in the 'Shop Online' button up top.

This one:

Image


I got lucky this way with the adjusting tool for the powervalve - this microfiche lists the gap distance in the tool:

502.12.022.100 - 34.5mm

Image


Set a digital caliper to 34.5mm and lock the jaws, place around top of cylinder and load powervalve shaft against the caliper jaws, pop the linkage on and tighten the arm.

Easy.

Image

Image

Image


Same thing to set the timing.

To set the timing they want you to have this nifty dial indicator that threads in the spark plug hole. Well that's silly says I....

Even easier would be to get a protractorImage


The literature shows to put the piston ~1.5mm below TDC which gives about 17* of advance, so zero the depth bar of a caliper through the spark plug hole, lock the measurement at ~1.5mm or thereabouts and rotate the piston up till it just touches the caliper. Then align the marks on the stator and lock it down. Re-check to make sure it's on spec.

Easy. Stupid, but easy.

Image

Image

Image


Then it was button everything back up, stick it in the frame:

Image

Image

Image


Swingarm pivot bolt & needle bearings were pretty gross, cleaned those up & fresh grease.

Image

Image


And in the frame:

Image
"You can educate ignorance, but you can't fix stupid."

User avatar
DrewP
Posts: 2084
Joined: Wed Dec 26, 2007 8:27 pm
Nickname: TANK
Number of Saabs currently owned: 1
Location: Monrovia, CA

Re: 1991 KTM 125 MX Rebuild / Resto

Postby DrewP » Wed Apr 18, 2012 11:44 am

Don't know what I was thinking about using the dial indicator for deck (X) height, I set it with a caliper, just didn't take a photo of that part.


Brake master was suuuuuper gross inside. The rubber splash seal dissolved into horrible black sludgey asphalt consistency adhesive. This was why there was no pressure to the front brake. Sadness.


Image

Image

Image


All kinds of corrodey:

Image


Lots of brake cleaner and the ultrasonic cleaner later:

Image

Image


The Dellorto VHSB 37 FD was pretty clean inside, just took it all apart, blew out the jets, new seals and put back together.

Image

Image

Image

Image

Image

Image

Image


I also found what I think came loose in the clutch side and got all chewed up in there.

The slide pin in the shift linkage was completely missing, so I made another pin that I staked into the hole to let the selector and ratchet slide against each other correctly.

Image

Image

Image

Image

Image
"You can educate ignorance, but you can't fix stupid."

User avatar
DrewP
Posts: 2084
Joined: Wed Dec 26, 2007 8:27 pm
Nickname: TANK
Number of Saabs currently owned: 1
Location: Monrovia, CA

Re: 1991 KTM 125 MX Rebuild / Resto

Postby DrewP » Wed Apr 18, 2012 11:44 am

These were my notes on the carb, comparing what is already in there to what the service book lists as the baseline setup:


Has:

K55 needle, 1st clip from top
P264 needle jet
208 main jet
40 pilot/idle jet
60 starting jet


Should Have:

K55, 2nd clip from top
264DP needle jet
212 main jet
40 pilot/idle jet
70 starting jet


So it's got a slightly larger main jet, but the needle down into the needle jet one clip more than baseline, and slightly larger starting jet.

It starts first kick, and runs great at low throttle openings, has a bit of a miss in the mid-range, and pulls smooth and hard up top, so I'm going to start by moving the needle back up another clip or maybe two to see how much effect that has on the midrange.

This was at between 4,000-4,500 feet and around 50-55 degrees.


I got it all back together middle of last week and rode it the first time (other than up and down the street) on Sunday.

Fired up basically first kick! I'm stoked!


Video:

https://picasaweb.google.com/10513133002089...804300890458482


Image


Came with a Dyno Port pipe that's practically perfect:

Image

Image

Image

Image


At Hungry Valley:

Image

Image

Image

Image

Image
"You can educate ignorance, but you can't fix stupid."


Return to “Random Thoughts”

Who is online

Users browsing this forum: No registered users and 1 guest